Sunday, December 31, 2017

Cuphead


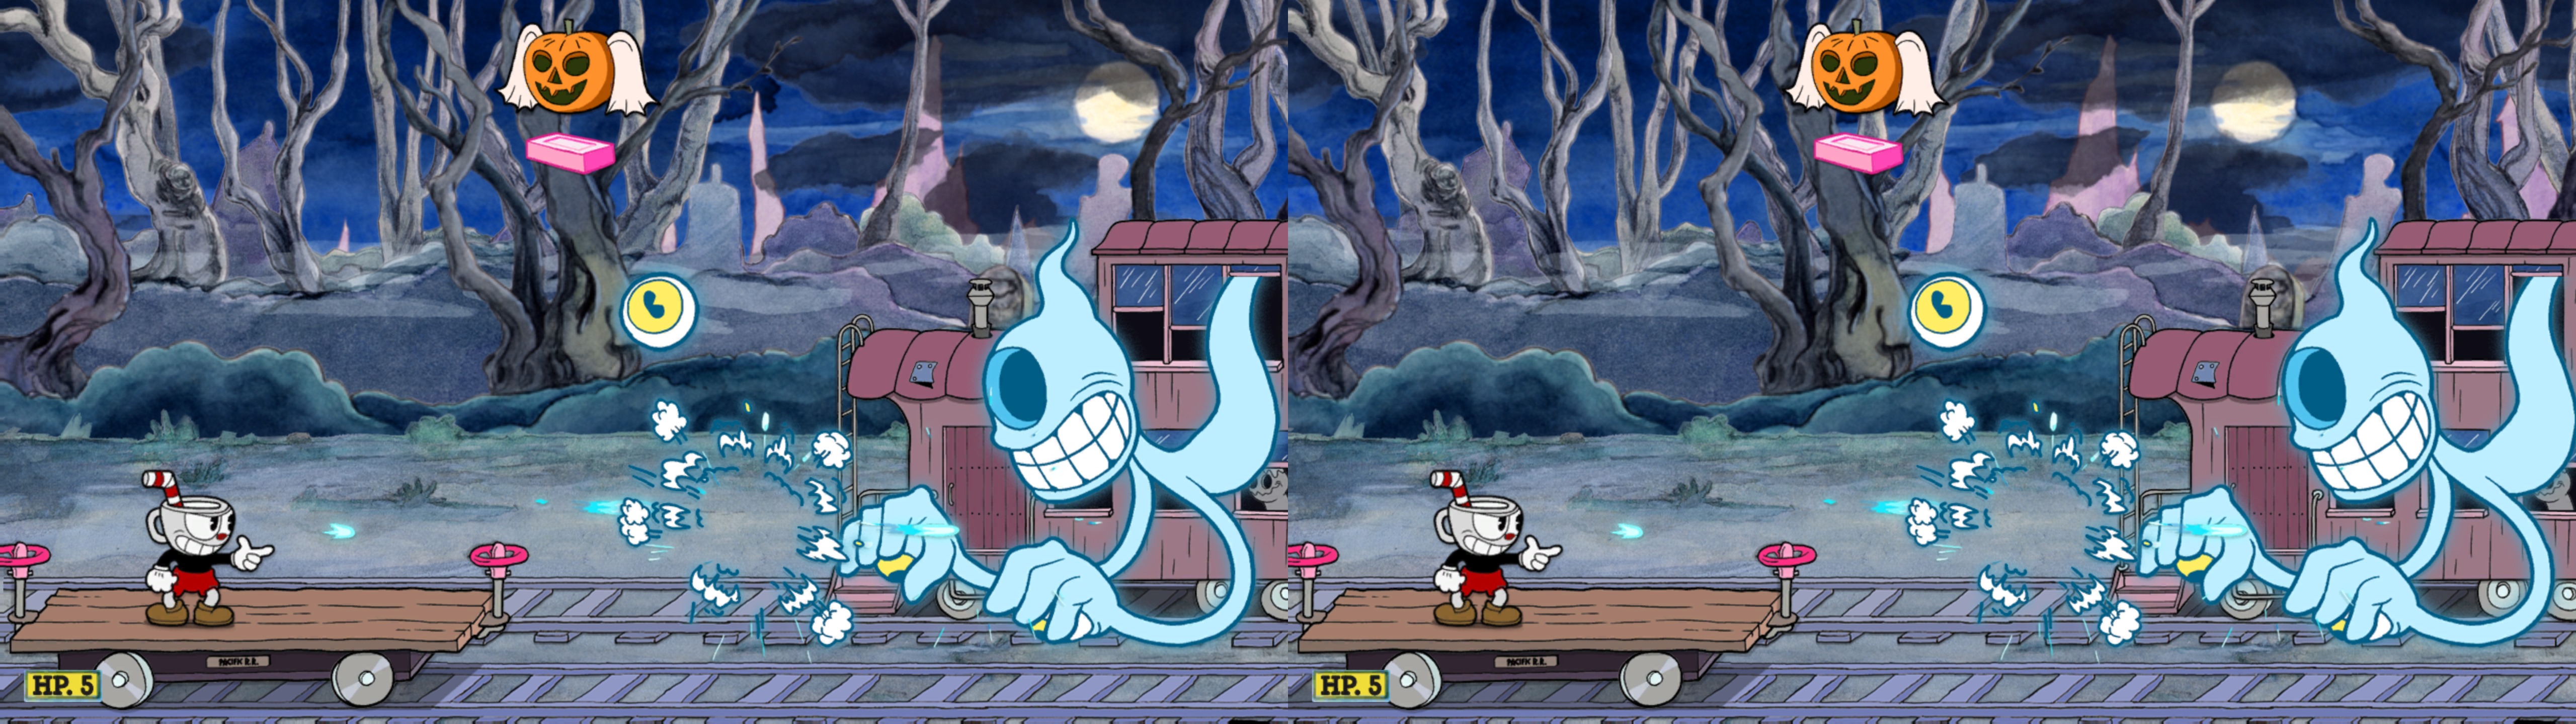
3D Vision feature for Cuphead, with some extra graphics options to disable some post processing filters. This isn't a fix, because the game was just 100% flat by default. This is layered (with curves sometimes) 3D made from scratch, texture by texture.


WARNING: as of the 1.2.2 update (April of 2019), the 3D fix is broken. Hotkey toggles for filters and HUD toggle still work, but you need to roll back to "hotfix 1.1.4" to make 3D work again.


Update (2018-04-07): updated the fix with 3Dmigoto 1.3.8, combined controller and keyboard hotkeys for convergence and HUD depth, and added two more textures for the "no flashing" mod (for run & gun levels).

Yet another update (2018-01-02): with this new update there is a new feature to disable flickering at the start of a level. Read the section below the installation steps.

Another update (2018-01-01): the last stage of Hilda Berg was missing 3D for some textures. I have updated the fix for that.

New update (2018-01-01): I have added shaders so you can disable film grain, chromatic aberration and blur in the other two color filters available. Black and white mode doesn't have chromatic aberration, so you don't need to use the chromatic aberration hotkey for that.

Update (four hours since the original post): redownload the fix again. I have included two new hotkeys to control chromatic aberration and film grain separately.


Fixed
- Geometry textures separated by custom layers that depend on separation and convergence.


Known issues
- Some elements that should be at different depths are in the same texture, so there can be some layers with wrong depth or a compromised setting, espacially the run & gun levels.
- The game can sometimes crash at boot. Just try to boot it again. This has been tested only with the GOG version.


Installation
- Download this file and extract its contents in the "Cuphead" folder, where "Cuphead.exe" is.
- The game needs to run in exclusive fullscreen mode to enable 3D. If you are going to launch the game through GOG Galaxy or Steam, make a launch command line parameter with "-window-mode exclusive" (no quotes). Do the same with a shortcut if you are booting the game standalone (for example, the GOG version without Galaxy).


- Launch the game. The first time you run it, it will ask for permission to write a setting (it's convergence) into the Nvidia game profile. Allow it.


Texture mod for no flickering at the start of levels
- This is a texture replacement mod that can't be toggled in real time. The textures come in the "ReplacementTextures" folder. To enable this mod, open "d3dx.ini", go to (currently) line 1062, and uncomment this block of text:

;[TextureOverrideFlash_1]
;Hash = f735b9a3
;ps-t0 = ResourceReplaceTexture1
;[TextureOverrideFlash_2]
;Hash = a27c9df9
;ps-t0 = ResourceReplaceTexture2
;[TextureOverrideFlash_3]
;Hash = 42cd867e
;ps-t0 = ResourceReplaceTexture3
;[TextureOverrideFlash_4]
;Hash = cacd7bdb
;ps-t0 = ResourceReplaceTexture4
;[TextureOverrideFlash_5]
;Hash = 423cf558
;ps-t0 = ResourceReplaceTexture5

So it will be:

[TextureOverrideFlash_1]
Hash = f735b9a3
ps-t0 = ResourceReplaceTexture1
[TextureOverrideFlash_2]
Hash = a27c9df9
ps-t0 = ResourceReplaceTexture2
[TextureOverrideFlash_3]
Hash = 42cd867e
ps-t0 = ResourceReplaceTexture3
[TextureOverrideFlash_4]
Hash = cacd7bdb
ps-t0 = ResourceReplaceTexture4
[TextureOverrideFlash_5]
Hash = 423cf558
ps-t0 = ResourceReplaceTexture5


Save the changes, and the next time you start the game, those textures won't flicker at the start of a level.


Hotkeys
- F1 or XB_RIGHT_THUMB: five convergence presets. Cuphead is at screen depth by default. These presets will lower convergence.
- F2 or XB_LEFT_THUMB: HUD depth presets. Screen depth by default.
- F3: HUD toggle.
- F4: film grain and chromatic aberration toggle. Not disabled by default. Warning: if you use overscan ingame, this hotkey will freeze the image. Use the separate hotkeys instead.
- F5: screen blur toggle. Not disabled by default.
- F6: aspect ratio cycle. Unmodified by default. It has also 16:9->2.37:1, 16:9->32:9 and 16:9->48:9 presets. For 21:9, it would be better to follow the pcgamingwiki steps.
- 1 (not the numpad): film grain toggle. Not disabled by default.
- 2 (not the numpad): chromatic aberration toggle. Not disabled by default.


If you liked this and want to contribute for more future fixes, you can donate to this PayPal account: masterotakusuko@gmail.com

Wednesday, December 27, 2017

X-Morph: Defense

3Dmigoto 3D Vision DX11 Fix
Last Updated: May 15, 2020

What this mod does:
- Fixes shadows, lights, 2D textures & haloing issues
- Places the HUD & UI at a fixed depth. (HUD & UI depth value can be changed in the d3dx.ini file)

Known Issue:
- Bullets from enemy ground units look weird

Installation:
1. Download this ZIP file & extract it into the directory that has the game's EXE file. For example:  "..\X-Morph Defense\Bin\"
2. Run "X-Morph_Launcher.exe" (in the Bin directory).
3. Enable "Full Screen" mode.  All other graphics settings can be maxed out. 

Tuesday, December 19, 2017

Hello Neighbor (DX11)


Fix:
- Shadows
- Lights
- Decals
- Halos in effects
- Lights Shaft
- Crosshair in 3D

TB and SBS Mode:
- The game support SBS/TB Mode using 3Dmigoto. Remove the ";" in the  ;run = CustomShader3DVision2SBS in the [Present] section of the d3dx.ini. Default TB Mode. F11 to cycle.

Game Settings:
- Use EFFECT = MEDIUM

Instructions:
- Extract where HelloNeighbor-Win64-Shipping.exe is located (\Hello Neighbor\HelloNeighbor\Binaries\Win64)
- Start the game, when "Rundll32" prompt appear, press "Yes". This is for the Profile Override needed for this game. In Nvidia overlay you will see "3Dfix by DHR".

Download

Screenshots


** Do you like the fix? **
If you like the fix, you can donate to this PAYPAL account: dhr.donation@gmail.com
Thanks!

Saturday, December 16, 2017

Nine Parchments


What this mod does:
- Fixes shadows, lights, decals & various haloing issues.
- Places the HUD & UI at a fixed depth
- Adds 2 convergence presets on the 'Caps Lock' key. The higher preset is for normal gaming. Use the lower preset for the cutscene in the training level. The lower preset will also make HUD & UI screen depth.

Installation:
1. Download this ZIP file & extract it into the game directory
2. Run the game
3. In the Options -> Visuals, set "Anti-Aliasing" to "High", "Very High", or "Extreme".
4. Set "Visual Quality" to "High" or "Highest"


Additional Notes:
- If you want to change the convergence on the Caps Lock key:
  1. Press the Caps Lock key until it's on the higher setting. 
  2. Adjust the convergence to your liking
  3. Press 'F7' to save your setting.
- If you want to change the depth of the HUD & UI:
  1. Open the file 19BA52CC.txt located in "..\ShaderOverride\Vertexshaders\"
  2. Where it says "def c247", change the value 0.2. (The higher it is, the more depth it will have).

Friday, December 15, 2017

Two Worlds 2 (DX9)


What this mod does:

-Removes too much brightness and bloom effects on objects
-Makes the game look more natural

-Optional improvements of gameplay, colour of the sky, sharper gras.


Installation:


1) Download this Zip-File


2) Extract into the folder where the games exe is located

You can additionaly improve gameplay and colors of  sky , sharpness of gras ect. by choosing beetween different settings files as described in the readme.txt.

You can also completely remove HUD and Character temporarily for taking sceenshots by using short console commands. ( see also readme.txt )


Notes:


The main purpose of this fix is to remove the annoying bloom effect which makes the whole game look way too bright. The additional autoexec file is not a must, it can easily be removed if those settings dont look good on your machine.


The fix does not yet bright up too dark areas like Dungeons. (i am not shure if this is possible at all).
If you turn up your monitor brightness a little you should get an acceptably ballanced view.


RJKole 2017


S.T.A.L.K.E.R.: Clear Sky (DX9)


What this does:
- Fixes bloom, sky, flickering ground textures & various haloing issues.
- Disables volumetric lighting from desk lamps
- Adds a convergence preset on the 'Caps Lock' key
- Adds a low convergence preset on the 'Right Mouse Button' (for aiming with iron sights)
- Adds a low depth, high convergence preset on the side mouse button 'Mouse 4'. Use this when aiming with a scope or when using binoculars.

Installation:
  1. Download this ZIP file & extract it into the game directory. (for example: ..\STALKER Clear Sky\ )
  2. Run the game.
  3. In the Options menu, under the Video tab, set "Renderer" to "Enhanced Full Dynamic Lighting (DX9)".  All other graphics settings can be set to the highest
  4. Click on the "Game" tab and disable "Show crosshair". If you want, you can enable Nvidia Laser Sight (Default key: Ctrl+F12 )
  5. Click on the "Controls" tab, scroll down to where it says "Zoom" and set the side mouse button "Mouse 4" as the Alternative.
  6. Restart the game for the changes to take effect
  7. When in-game, press the 'Caps Lock' key and adjust the depth and convergence to your liking.
  8. Press 'F7' to save your setting. 

 Additional Notes:
- Keybindings for the above convergence presets can be changed in the dx9settings.ini file.
- To adjust the convergence or depth for the above aiming presets: Hold the button down and simultaneously adjust the depth & convergence to your liking. Before releasing the button, press 'F7' to save your settings.
- Sometimes when transitioning to another area, the fix gets broken. If this happens, press the Right Mouse Button to re-enable the fix.
- Some graphical mods may break this fix. I verified this fix works with:
  • Sky Reclamation Project (SRP) v1.1.2
  • Absolute Nature 2
  • Absolute Structures
  • Arsenal Overhaul v1.2
  • Atmosfear v1.3
  • Clear Sky Complete v1.1.2

    Wednesday, December 13, 2017

    Prey 2017 (DX11)


    Update 03-11-2019:
    - Fix Update due game update


    Big Thanks to bo3b!!!! for make the DLL loader that makes 3Dmigoto works in this game.
    Big Thanks to Kaimasta!!!! for help me testing and suggesting some profiles that make shadows visible in this game in S3D.

    Fix:
    - Shadows
    - Lights
    - Tile Lights
    - SSR and Reflections
    - Decals
    - Halos in effects
    - Lights Shaft
    - HUD and Crosshair

    TB and SBS Mode:
    - The game support SBS/TB Mode using 3Dmigoto. Remove the ";" in the  ;run = CustomShader3DVision2SBS in the [Present] section of the d3dx.ini. Default TB Mode. F11 to cycle.

    Note:
    - There is a few culling issues with shadows/lights, really minor.
    - Recommend using r_Sharpening = 0.5  or higher (if your GPU handles).

    Settings:
    - Fix works with Presets = HIGH or VERY HIGH.
    - Use FXAA or No AA. SMAA is broken.

    Note 2:
    - If you see some blurred weapons and stuff. Create a file named autoexec.cfg in the root of the game install (/Prey) and add the "r_MotionBlur = 0" Without the quotes, save the file. I don't know why the ShaderOveride to remove Motion Blur is not working for all.

    Presets:
    - "O" key to cycle Crosshair and Icons depth
    - "." (dot) key to toggle "minimal HUD" **ONLY with Old version of the game **
    - "," (comma) key to togle between lower Hand/Gun convergence and default. In some parts, like outer space (with the helmet) is automatic. **ONLY with Old version of the game **

    Instructions:
    - Extract where Prey.exe is located (\Prey\Binaries\Danielle\x64\Release)
    - Start the game, when "Rundll32" prompt appear, press "Yes". This is for the Profile Override needed for this game. In Nvidia overlay you will see "3Dfix by DHR".

    Download

    Screenshots

    ** Do you like the fix? **
    If you like the fix, you can donate to this PAYPAL account: dhr.donation@gmail.com
    Thanks!

    Sunday, December 10, 2017

    S.T.A.L.K.E.R.: Shadow of Chernobyl


    Last Updated:  December 11, 2017

    What this does:
    - Fixes an issue where the entire screen was being pushed into depth.
    - Fixes skybox, muzzle flash depth, flickering ground textures & haloing issues.
    - Adds a convergence preset on the 'Caps Lock' key
    - Adds a low convergence preset on the 'Right Mouse Button' (for aiming with iron sights)
    - Adds a low depth, high convergence preset on the side mouse button 'Mouse 4'. Use this when aiming with a scope or when using binoculars.

    Installation:
    1. Using Nvidia Inspector, remove "XR_3DA.exe" from the "S.T.A.L.K.E.R.: Shadow of Chernobyl" profile and assign it to the "S.T.A.L.K.E.R.: Clear Sky" profile.
    2. Download this ZIP file & extract it into the game directory. (for example: ..\STALKER Shadow of Chernobyl\ )
    3. Run the file "HeliXmodLauncher.bat" in the game directory.  (You will need to keep this window open before you start this game.)
    4. Run the game.
    5. In the Options menu, under the Video tab, set "Renderer" to "Full dynamic lighting".  All other graphics settings can be set to the highest
    6. Click on the "Game" tab and disable "Show crosshair". If you want, you can enable Nvidia Laser Sight crosshair (Default key: Ctrl+F12 )
    7. Click on the "Controls" tab, scroll down to where it says "Zoom" and set the side mouse button "Mouse 4" as the Alternative.
    8. Restart the game for the changes to take effect
    9. When in-game, press the 'Caps Lock' key and adjust the depth and convergence to your liking.
    10. Press 'F7' to save your setting. 

     Additional Notes:
    - Keybindings for the above convergence presets can be changed in the dx9settings.ini file.
    - To adjust the convergence or depth for the above aiming presets: Hold the button down and simultaneously adjust the depth & convergence to your liking. Before releasing the button, press 'F7' to save your settings.
    - Sometimes when transitioning to another area, the fix gets broken. If this happens, press the Right Mouse Button to re-enable the fix.
    - Some graphical mods may break this fix. I verified this fix works with:
    • Stalker Complete 2009 v1.4.4
    • Autumn Aurora 2.1
    • S.T.A.L.K.E.R. Oblivion Lost U.L.T.I.M.A.T.E. 
    • Photo Realistic Zone  2.1
    • Zone Reclamation Project 1.07
    • S.W.O. (S.T.A.L.K.E.R. Weather Overhauled) v3.1 
    • S.T.A.L.K.E.R. Lost Alpha v1.4002 (DX9)

    Update 6-10-19 (bo3b): For GoG version use GoG_Stalker.zip
      Drop into game root folder, not where .exe resides.
      Set XR_3DA.exe to not require Admin.
      Working on Win10 1803, Driver 419.67.

      Monday, December 4, 2017

      Arma 3

      3Dmigoto DX11 Fix by The_Nephilim & 4everAwake

      Last Updated: August 4, 2020

      What this mod does:
      - Fixes shadows, sky & water reflections
      - Places bloom, lens flare, HUD & UI at a fixed depth
      - Fixes an issue where some textures were missing or white.
      - Disables underwater caustics
      - Adds four HUD depth settings on the 'Y' key. Press this to cycle through different HUD & UI depths.
      - Adds a momentary low convergence preset on the side mouse button 'Mouse 4'. Use this for aiming with iron sights or scope.
      - Adds a momentary low convergence preset on the 'K' key (for compass)
      - Adds a momentary low convergence preset on the 'O' key (for wrist watch)
      - Adds a low convergence toggle preset on the 'Caps Lock' key. (this key is optional)

      Known Issues:
      - This fix is not compatible with Battleye (Arma 3 anti-cheat software). You will get an error message when Battleye is enabled.
      - Since bloom is at a fixed depth, it looks incorrect when up close. 

      Installation:
      1. Using Nvidia Inspector, remove "arma3_x64.exe" from the "Arma 3" profile and assign it to "The Witcher 3" profile
      2. Run the game using "arma3_x64.exe" 
      3. Disable Compatibility Mode (Default keys: Ctrl+Alt+F11)
      4. In the Options -> Video -> Display menu, set your preferred resolution.
      5. Set "Display Mode" to "Fullscreen"
      6. Click on the "AA & PP" tab.
      7. Set "Radial Blur" and "Rotational Blur" to 0.
      8. Set "AO" to any HBAO+ setting.
      9. Set "FSAA" to "8x"
      10. Exit the game.
      11. Download this ZIP file & extract it into the game directory.

       Additional Notes:
      - If 3D doesn't kick in at first, try pressing Alt+Enter to enable it.
      - HUD / UI depth, crosshair depth, convergence presets & associated keybindings can be changed in the d3dx.ini file.
      - Tested this fix with all graphics settings maxed out.
      - It's uncertain if there are any SLI-related issues with this fix.

      Also, big thanks to everyone who assisted with The_Nephilim's Arma 3 WIP.

      Sunday, December 3, 2017

      Unforgiving A Northern Hymn (DX11)


      Update 12/04:
      - Correct a mistake i made in 1 ShaderRegex for CS Lights Shafts/Volumetric Lights. redownload the fix.

      Fix:
      - Shadows
      - Lights
      - Decals
      - Halos in effects
      - Lights Shaft
      - Specular highlights
      - CS Lights Shafts and Glow

      TB and SBS Mode:
      - The game support SBS/TB Mode using 3Dmigoto. Remove the ";" in the  ;run = CustomShader3DVision2SBS in the [Present] section of the d3dx.ini. Default TB Mode. F11 to cycle.

      Note:
      - Disable Crosshair in game option

      Instructions:
      - Extract where Unforgiving-Win64-Shipping.exe is located (\Unforgiving - A Northern Hymn\Unforgiving\Binaries\Win64)
      - Start the game, when "Rundll32" prompt appear, press "Yes". This is for the Profile Override needed for this game. In Nvidia overlay you will see "3Dfix by DHR".

      Download


      ** Do you like the fix? **
      If you like the fix, you can donate to this PAYPAL account: dhr.donation@gmail.com
      Thanks!

      Saturday, December 2, 2017

      Dragon Ball Xenoverse


      UPDATE: fix update (2017-12-02). On Windows 10 the characters cel shading and bloom shaders were complaining that I wasn't returning any color information when the hotkey was enabled, so they showed a lot of artifacts. I've fixed that. Also, I've also changed the previous F7 hotkey to F8, to not interfere with convergence presets saving. The download link hasn't changed.

      Fixed
      - Water reflections.
      - Floor reflections.
      - Portals.
      - Wrong refraction/transparency in some special attacks.

      Disabled
      - A double image effect that appears for a split second when you start to fly fast.

      Hotkeys
      - F1 and F2: convergence presets. To overwrite the settings, press ctrl+F7.
      - F3: environment cel shading toggle. Not disabled by default.
      - F4: characters cel shading toggle. Not disabled by default.
      - F5: bloom toggle (if it's enabled in the game options). Not disabled by default.
      - F6: sun shafts + shiny sun shader toggle. Not disabled by default. To disable it correctly, don't press the key when you are looking at the effect or it will get stuck in that position. You can do it just after you boot the game, for example.
      - F8: crosshair (among other things, like the d-pad left information) depth presets. Screen depth by default. Keep pressing this hotkey to increase depth (multiple steps between 50% and 100%). As it isn't dynamic, its accuracy will depend on distance and the depth you choose. Warning: area icons in portals are also used in the d-pad up mission briefing, so they will be at depth there too.

      Installation
      - Download this file and extract its contents in the root folder of the game ("DB Xenoverse" folder).

      LEGO Marvel Super Heroes 2 (DX11)


      Fix:
      - Unlock Convergence
      - Fix image flickering (Follow the instructions!!)
      - Shadows
      - Lights
      - Normal Reflections
      - SSR
      - Halos in effects
      - Dynamics Crosshair

      Presets:
      - Xbox Right thumb button (toggle) for cinematics
      - "P" key (toggle) for cinematics

      Notes:
      - Disable motion blur and DOF
      - HUD is not perfect, this game have a lot of HUD elements....fixing one, break another.

      TB and SBS Mode:
      - The game support SBS/TB Mode using 3Dmigoto. Remove the ";" in the  ;run = CustomShader3DVision2SBS in the [Present] section of the d3dx.ini. Default TB Mode. F11 to cycle.

      Instructions:
      IMPORTANT!!!  Edit LEGOMARVEL2_DX11.exe with Notepad++ and change "nvapi64.dll" to "nbapi64.dll" in 3 Spots. Save the EXE.   BACK UP THE ORIGINAL EXE.
      - Extract where LEGOMARVEL2_DX11.exe is located (\LEGO Marvel Super Heroes 2)
      - Start the game, when "Rundll32" prompt appear, press "Yes". This is for the Profile Override needed for this game.


      Download

      Screenshots


      ** Do you like the fix? **
      If you like the fix, you can donate to this PAYPAL account: dhr.donation@gmail.com
      Thanks!

      Thursday, November 23, 2017

      Legacy of Kain: Defiance


      This is a guide to play Legacy of Kain: Defiance properly in 3D. The fix included here isn't necessary. It's just for convergence hotkeys.


      This is a DX9 game that mostly only suffers from HUD stereoization problems (it goes out of the screen after certain convergence levels). This can be fixed by modifying the game profile in Nvidia Inspector. Here are the settings that you must use (in bolder font):


      In text format, just in case the image disappears someday:

      SettingValueComments
      Profile nameLegacy of Kain: DefianceNot a setting, but just for your information.
      StereoCutoff0x00000002Necessary to enable the following tweak.
      StereoCutoffDepthNear0x430C0000This makes the HUD 2D, in collaboration with the previous setting. In some cutscenes, if something is too close to the camera, some geometry elements may become 2D. It's unavoidable.
      StereoMemoEnabledNoJust to disable the green text information.
      StereoProfileYesNecessary to use non default configurations.
      StereoTextureEnable0x00000001The default value of 0x00000023 is fine too, but it will stereoize the render target associated with the sword attack (a transparency effect), which can't be fixed by normal means apparently.


      IMPORTANT: disable Windows XP SP2 compatibility mode in the game "defiance.exe" file.

      To use three convergence presets (F1, F2, F3, that can be overwritten with F7), use this fix and unzip it in the "Legacy of Kain Defiance" folder, where "defiance.exe" is. However, you'll surely want to use the 16:9 mod that also has a "d3d9.dll". To make both work at the same time, you'll need Ultimate ASI Loader used as "dsound.dll" instead of "dinput8.dll". Then rename the "d3d9.dll" from the aspect ratio mod to "d3d9.asi" and set your resolution in "sr3.ini".

      I took the liberty of putting all these mods together in the same file. I don't take responsibility for how those mods may affect your game. Change the resolution in "sr3.ini" if you need it (it's 2560x1440 in my file).


      If you are wondering why I didn't fix the HUD using shaders, it's because the game only has 3 vertex shaders, and none of them seemed to be the HUD nor the sword transparency effect, so my hands were tied.


      If you liked the guide and want to contribute for more future fixes, you can donate to this PayPal account: masterotakusuko@gmail.com

      Legacy of Kain: Blood Omen 2


      3D Vision fix for Legacy of Kain: Blood Omen 2. It includes an aspect ratio mod for triple monitor, to use on top of the 16:9 game exe that already exists. The fix needs dgVoodoo to convert DX8 into DX11.


      Fixed
      - HUD fixed, unstretched, and at customizable depth.
      - Fixed "layer" was making 3D broken at normal convergence levels.
      - Fixed skybox.


      Installation
      - Download this file and extract its contents in the "Legacy of Kain Blood Omen 2" folder, where "bo2.exe" is.
      - I recommend using the 16:9 mod here, because by default I unstretch the HUD and videos: http://www.wsgf.org/dr/blood-omen-2-legacy-kain
      - The F6 aspect ratio mod is made only for 3x 16:9 monitors this time (thre isn't too much culling and there are only ".exe" mods up to 21:9).
      - Download the latest dgVoodoo 2 release or WIP version here: http://dege.freeweb.hu/dgVoodoo2/dgVoodoo2.html
      - From inside its "MS" folder, copy "D3D8.dll", "D3DImm.dll" and "DDraw.dll" into the game folder.
      - Open "dgVoodooCpl.exe" and configure it like this, for example, tuning the resolution and some other settings to your liking:


      - Boot the game.


      Hotkeys
      - F2: six convergence presets .
      - F3: HUD depth presets. Screen depth by default.
      - F4: HUD toggle. Not disabled by default.
      - F5: black bars toggle for cutscenes. Bars not disabled by default.
      - F6: aspect ratio mod for triple monitor. Assuming base 16:9 mod is used.


      HUD stretching
      - In "d3dx.ini", there is a line that says "w2=0.75". That's the HUD unstretching from 4:3 to 16:9. Change it to "w2=1" if you want stretched HUD. The triple monitor hotkey mod will make it unstretched for that aspect ratio automatically.


      If you liked the fix and want to contribute for more future fixes, you can donate to this PayPal account: masterotakusuko@gmail.com

      Sunday, November 19, 2017

      Legacy of Kain: Soul Reaver 2


      3D Vision fix for Legacy of Kain: Soul Reaver 2. It includes an aspect ratio mod, but there's a better method that I'll explain. The fix needs dgVoodoo to convert DX8 into DX11.


      Fixed
      - HUD fixed and at customizable depth.
      - Fixed "layer" was making 3D broken at normal convergence levels.
      - Changed the default frustum setting in the game profile. It was causing stretching issues.


      Known issues
      - I tried to unstretch prerendered cutscenes, but that corrupted the HUD graphics (even without modifying the aspect ratio).


      Installation
      - Download this file and extract its contents in the "Legacy of Kain Soul Reaver 2" folder, where "sr2.exe" is.
      - This time my F4 aspect ratio mod is not used by default. If you want to play in good 16:9 (with no clipping/culling), get the aspect ratio mod by nemesis2000. Rename its "d3d8.dll" to "d3d8.asi", copy the files to the game folder, and also place there the Ultimate ASI Loader (32 bit version) dll as "dsound.dll" (renamed from "dinput8.dll"). Open "sr2.ini" and write your native resolution. I also use "widescreen = 1" there, but it's your choice to make.
      - Download the latest dgVoodoo 2 release or WIP version here: http://dege.freeweb.hu/dgVoodoo2/dgVoodoo2.html
      - From inside its "MS" folder, copy "D3D8.dll", "D3DImm.dll" and "DDraw.dll" into the game folder.
      - Open "dgVoodooCpl.exe" and configure it like this, for example, tuning the resolution and some other settings to your liking:


      - Boot the game. There is a resolution selector ingame, but I think it doesn't matter (I chose my native resolution this time).
      - dgVoodoo will override that resolution 
      - I recommend using SGSSAA in the game profile ("Santa Ride! 2" profile, lol), because there is still some aliasing with MSAA and there is a lack of mipmaps.


      Hotkeys
      - F2: nine convergence presets (cutscenes really need the low ones, but gameplay needs very high convergence. That's why I made so many).
      - F3: HUD depth presets. Screen depth by default. Some elements will have different depth than others.
      - F4: aspect ratio presets. Not used by default. The order is: 4:3, 16:9, AR for 2560x1080, AR for 3440x1440, and 48:9. Numbers calculated assuming you aren't using the other widescreen mod.
      - F5: black bars toggle for cutscenes. Bars not disabled by default.


      If you liked the fix and want to contribute for more future fixes, you can donate to this PayPal account: masterotakusuko@gmail.com

      Legacy of Kain: Soul Reaver


      3D Vision fix for Legacy of Kain: Soul Reaver. It includes somewhat useful aspect ratio mod. The fix needs dgVoodoo to convert DX7 into DX11.

      Small update (2017-11-22): I've changed the way I alter the aspect ratio for the main menu, and also for dgVoodoo WIP 37.

      Update (2017-11-20): I've updated the fix. A fog layer was missing a fix, so the fix now includes that. The download link is the same. I'll keep testing the game as I play.


      Fixed
      - HUD fixed and at customizable depth.
      - Fixed "layer" was making 3D broken at normal convergence levels.


      Known issues (not caused by the fix and not related to 3D)
      - If you use SRHook to be able to play at >30fps, the game will skip all prerendered cutscenes.
      - There isn't any true (Hor+) widescreen mod. Mine enables the extra blank space to be used by geometry that would otherwise be outside of the 4:3 area in the view of one eye, or if you use extremely high convergence.


      Installation
      - Download this file and extract its contents in the "Legacy of Kain Soul Reaver" folder, where "kain2.exe" is.
      - Unzip the SRHook mod in the same folder if you want to play at more than 30fps (beware of the videos bug). I recommend limiting the fps to something higher than 60, to avoid some stuttering.
      - Check the properties of "kain2.exe" and disable Windows XP (Service Pack 2) compatibility.


      - Download the latest dgVoodoo 2 release or WIP version here: http://dege.freeweb.hu/dgVoodoo2/dgVoodoo2.html
      - From inside its "MS" folder, copy "D3D8.dll", "D3DImm.dll" and "DDraw.dll" into the game folder.
      - Open "dgVoodooCpl.exe" and configure it like this, for example, tuning the resolution and some other settings to your liking:


      - According to the dgVoodoo page, you may need the Winplay DLL patch if you experience some crashes (I think I dodn't need it. But I tried it and the game worked with it too): http://dege.fw.hu/Patches/Patches.html
      - Boot the game. The graphics and sound configuration will appear. Use a 4:3 resolution like this if you want to use my widescreen mod:


      - dgVoodoo will override that low resolution with your real one, and my aspect ratio mod will unstretch the game geometry, HUD and menus. F4 changes the aspect ratio in real time, but check "d3dx.ini", above the "w=0.75" line, to see the instructions. If you use an ingame 16:9 resolution AND use SRHook, the game will use a Vert- widescreen mode on top of my mod. Set "w=1" in "d3dx.ini" if you want to use the SRHook widescreen method.
      - I recommend using SGSSAA in the game profile for non demanding games like this one.


      Hotkeys
      - F2: five convergence presets.
      - F3: HUD depth presets. Screen depth by default. Some elements will have different depth than others.
      - F4: aspect ratio presets. The default one is 16:9. The order is: 4:3, 16:9, AR for 2560x1080, AR for 3440x1440, and 48:9.
      - F5: black bars toggle for cutscenes. Bars not disabled by default. Warning:  It will also disable your life bar.


      If you liked the fix and want to contribute for more future fixes, you can donate to this PayPal account: masterotakusuko@gmail.com

      Saturday, November 18, 2017

      Tomb Raider 2-3-4-5


      3D Vision fixes for the classic Tomb Raider games (2, 3, The Last Revelation, Chronicles). The fix needs dgVoodoo to convert the games into DX11.


      Fixed
      - HUD depth is now fixed and customizable (TR 2-3-4-5).
      - Improved sun glare (TR 4).
      - Added a black bars toggle hotkey (TR 4).


      Known issues
      - You will have to disable FMVs in TR 2. They play fine, but after they end, the game will crash. The other games are fine.
      - Very distant (black) geometry in TR 2 will be at full depth instead of proper depth (not too annoying). The other games are fine.
      - Except for TR 3 (and partially TR 5), the skybox/background is at a fairly close depth. I couldn't find a way to fix it without breaking other geometry.
      - NEVER close Tomb Raider 3 via alt+F4, because it will delete your game configuration and break the graphics until you configure it again. This isn't a bug of the fix, but you should be aware of it. It's safe in the other games.
      - There is some flickering at the left and right borders of the screen, where the game doesn't want to draw geometry. Use your frustum hotkey (ctrl+F11 by default) until the borders are cropped.


      Installation
      - Download this file for TR 2-3-5 or this file for TR 4 and extract its contents in the root folder of the corresponding game.

      - Partial path to the game executables in order, corresponding to the GOG versions:

      "Tomb Raider 2\Tomb2.exe"
      "Tomb Raider 3\tomb3.exe"
      "Tomb Raider 4\tomb4.exe"
      "Tomb Raider 5\PCTomb5.exe"

      - TR 2 will probably not boot on Windows 10 (in my case,  the process was stuck). Use this if it happens: https://pcgamingwiki.com/wiki/Tomb_Raider_II#GOG.com_version_not_running_on_Windows_10
      - At this point, if you want to play them in widescreen you'll have to patch the game exe with this, which will work with TR 2-3-4-5 (also use the config below): https://community.pcgamingwiki.com/files/file/394-tomb-raider-234-widescreen-patch/


      - Download the latest dgVoodoo 2 release or WIP version here: http://dege.freeweb.hu/dgVoodoo2/dgVoodoo2.html
      - From inside its "MS" folder, copy "D3D8.dll", "D3DImm.dll" and "DDraw.dll" into the game folder.
      - Open "dgVoodooCpl.exe" and configure it like this, for example, tuning the resolution and some other settings to your liking (use 16xAF if you don't want a pixelated look):


      - To configure the graphics of the game, make a shortcut to the game ".exe" and make it end with " -setup" after the path (no quotes, and used outside the quotes of the path to the ".exe"). The resolution used "ingame" will be used as a zoom level and won't affect the real resolution. 1280x720 is a good balance, and higher than 1920x1200 may make the game crash.
      - I recommend forcing SGSSAA in the game profile, especially if you use "Force point sampled" for textures. These games aren't demanding.
      - Boot the game and play.


      Hotkeys
      - l: six convergence presets.
      - o: HUD depth presets. Screen depth by default.
      - k: black bars toggle for cutscenes. TR 4 exclusive.


      If you liked the fix and want to contribute for more future fixes, you can donate to this PayPal account: masterotakusuko@gmail.com

      Company of Heroes 2

      3Dmigoto 3D Vision DX11 Fix
      What this mod does:
      - Fixes shadows, lights, ground textures, water reflections, fog of war, halos & 2D effects (blizzard, raindrops,.. etc)
      - Places the HUD & UI (including mouse cursor) at a fixed depth when playing a mission. (I left the Main Menu at screen depth due to some UI unevenness-- see Additional Notes below).

      Installation:
      - Download this ZIP file and extract the contents into the game directory.

       Additional Notes:
      - Tested this fix with all graphics settings maxed out.
      - This fix should work will all DLCs. Though I've yet to test all of the maps. 
      - HUD depth value can be changed in the d3dx.ini file.
      - If you want to push the Main Menu into depth: in the d3dx.ini file, under [ShaderOverrideMainMenu], set the 'z' value to '0'
      - This isn't 3D related, but 'HUD Scale' bar in the Options menu is only enabled if the resolution is higher than 1920x1080.

      Friday, November 17, 2017

      The Evil Within 2 (DX11)

      THIS GAME WILL WORKS IN CHECKERBOARD 3D MODE (SELECTING FROM NVIDIA CONTROL PANEL), SIDE BY SIDE AND TOP AND BOTTOM 3D MODE. HAVE THE SAME PROBLEM THAN TEW1.

      FOR 3DVISION, FOLLOW THIS TUTORIAL TO MAKE THE GAME WORKS: GEFORCE FORUM TOPIC. THANKS HELIFAX!!!

      Special THANKS to bo3b that help me with one decompiler issues, that lead to me to find the correct pattern to fix it.

      Update 12-30:
      - Update the fix for potencial lights disappearing on certain configuration/setup.

      Fix:
      - Shadows
      - Lights
      - Normal Reflections
      - Screen Space Reflections
      - Volumetric Lighting
      - Decals (Blood and others)
      - Lensflares (aproximate)
      - Some 2D objects
      - Crosshair and icons are in 3D

      Presets:
      - "P" key cycle crosshair/icons depth.

      TB and SBS Mode: 
      - The game support SBS/TB Mode using 3Dmigoto. The game will start by default in TAB 3D Mode. F11 to cycle through different 3D Modes (CB, SBS, TAB, Interleaced and 3DVision)

      Notes:
      - If for some reason when you enter the game you see some 2D objects or strange/black textures or flickering textures, exit the game and enter again. I don't know but sometimes the game have some corruption, this happens with or without the fix in S3D. I try disabling Shader Cache in NVCP, but still happens.
      - Disable Motion Blur and DOF (lower option)
      - Use AA = FXAA or OFF. TAA is broken.

      Instructions:
      - Extract the .zip where  TEW2.exe is located (\The Evil Within 2)
      - Start the game, when "Rundll32" prompt appear, press "Yes". This is for the Profile Override needed for this game.

      Download


      Screenshots

      Geforce.com forum thread

      ** Do you like the fix? **
      If you like the fix, you can donate to this PAYPAL account: dhr.donation@gmail.com
      Thanks!

      Thursday, November 16, 2017

      Hitman: Contracts


      3D Vision fix for Hitman: Contracts. It includes a Hor+ aspect ratio mod (up to triple monitor, but customizable for custom aspect ratio too. It's done by shaders) which is moderately affected by culling (NOTE: there is an alternative widescreen method). The fix needs dgVoodoo to convert DX8 into DX11.

      UPDATE: I've updated the fix today (2017-11-17) for some possible stability fix.

      Fixed
      - Stereoized bloom.
      - Disabled distant "shadow/fog" (at a fixed distance from the character) that I suspect was unintended to appear. It isn't caused by 3D or broken in 3D. It was just annoying.
      - Aspect ratio of cutscenes (manual hotkey).
      - Something that broke the image of mirrors at certain camera angles.
      - HUD at customizable depth.


      Known issues
      - Things very close to the camera will suddenly appear at a lot of depth, breaking the consistence of geometry. Mostly only noticeable in narrow corridors or wall mirrors. This is an issue with the drivers.
      - Using the prerendered cutscenes AR hotkey will break ingame graphics. Go back to the default setting after the cutscene is done.


      Installation
      - Download this file and extract its contents in the "Hitman - Contracts" folder, where "HitmanContracts.exe" is.
      - Download the latest dgVoodoo 2 release or WIP version here: http://dege.freeweb.hu/dgVoodoo2/dgVoodoo2.html
      - From inside its "MS" folder, copy "D3D8.dll", "D3DImm.dll" and "DDraw.dll" into the game folder.
      - Open "dgVoodooCpl.exe" and configure it like this, for example, tuning the resolution and some other settings to your liking:


      - In "HitmanContracts.ini" (in the root folder of the game) or ingame, use any 4:3 resolution, like "Resolution 1024x768". Even if it says 1024x768 there, that will only control HUD scaling and not the internal resolution. In my case (1440p monitor), I use 1600x1200.

      - Using that internal resolution and not any other widescreen trick, the game will be proper 16:9 thanks to the fix. F4 changes the aspect ratio in real time, but check "d3dx.ini", above the "w=0.75" line, to see the instructions.
      - Boot the game and play.

      Better widescreen
      - The widescreen mod by nemesis2000 is better and doesn't suffer from clipping. It also has some extra features.
      - To use it, rename its "d3d8.dll" to "d3d8.asi", place the three files inside the game folder and configure "h3.ini" with the settings you want.
      - Download Ultimate ASI Loader  (32 bit version) and place the "dinput8.dll" in the game folder.
      - Open "d3dx.ini" and change "w=0.75" to "w=1", because you won't need my widescreen method.


      Hotkeys
      - p: six convergence presets.
      - F3: HUD depth presets (crosshair included). Screen depth by default.
      - F4: aspect ratio presets. The default one is 16:9. The order is: 4:3, 16:9, AR for 2560x1080, AR for 3440x1440, and 48:9.
      - F5: toggles the weird "shadow" at distance. Shadow disabled by default.
      - F6: bloom toggle. Not disabled by default.
      - o: cutscenes aspect ratio presets. By default, 4:3 stretched. Press once and it will crop the necessary parts of the top and bottom black bars (using the F4 hotkey value as reference). Press it again and it will be just centered in the 4:3 area without any stretching.


      If you liked the fix and want to contribute for more future fixes, you can donate to this PayPal account: masterotakusuko@gmail.com

      Monday, November 13, 2017

      Hitman 2: Silent Assassin


      3D Vision fix for Hitman 2: Silent Assassin. It includes a Hor+ aspect ratio mod (up to triple monitor, but customizable for custom aspect ratio too. It's done by shaders) which is NOT affected by culling (it will render perfectly). The fix needs dgVoodoo to convert DX8 into DX11.

      UPDATE: I've updated the fix today (2017-11-17) to filter the HUD better.

      Fixed
      - Sun light depth.
      - HUD elements and subtitles (they disappeared at moderate convergence levels before).
      - Crosshair.


      Known issues
      - Not exactly an issue, but I had to force cutscene subtitles and some menus at max depth, because the sun light depends on it. Normal ingame subtitles and HUD aren't affected by this.


      Installation
      - Download this file and extract its contents in the "Hitman 2 Silent Assassin" folder, where "hitman2.exe" is.
      - Download the latest dgVoodoo 2 release or WIP version here: http://dege.freeweb.hu/dgVoodoo2/dgVoodoo2.html
      - From inside its "MS" folder, copy "D3D8.dll", "D3DImm.dll" and "DDraw.dll" into the game folder.
      - Open "dgVoodooCpl.exe" and configure it like this, for example, tuning the resolution and some other settings to your liking:


      - In "Hitman 2.ini" (in the root folder of the game), use "Resolution 1024x768". Even if it says 1024x768 there, that will only control HUD scaling and not the internal resolution.

      - Using that internal resolution and not any other widescreen trick, the game will be proper 16:9 thanks to the fix. F4 changes the aspect ratio in real time, but check "d3dx.ini", above the "w=0.75" line, to see the instructions.
      - Boot the game and play.


      Hotkeys
      - p: six convergence presets.
      - F3: HUD depth presets (crosshair included). Screen depth by default. Unlike in the fix of the first game, this time all the HUD will move to the same depth.
      - F4: aspect ratio presets. The default one is 16:9. The order is: 4:3, 16:9, AR for 2560x1080, AR for 3440x1440, and 48:9.


      NOT alternative widescreen mode
      - There are some other methods on the internet that will tell you to use:

      Window
      StartUpperPos 0,0

      This works for Hitman: Codename 47, but in this game those settings will disable 3D completely. Just use my aspect ratio mod, because it doesn't have drawbacks.


      If you liked the fix and want to contribute for more future fixes, you can donate to this PayPal account: masterotakusuko@gmail.com

      Hitman: Codename 47


      3D Vision fix for Hitman: Codename 47. It includes a Hor+ aspect ratio mod (up to triple monitor, but customizable for custom aspect ratio too. It's done by shaders) which is affected by culling. The fix needs dgVoodoo to convert DX7 into DX11.

      UPDATE: I've updated the fix today (2017-11-17) to filter the HUD better and avoid breaking other effects at a close camera distance. I've also made a hotkey ("i") to more or less fix geometry in the Traditions of the Trade mission.

      Fixed
      - A "layer" that made the game not be useable at almost anything other than 0-1 convergence.
      - Skybox.
      - Distant backgrounds.
      - Distant fog-covered elements.
      - HUD elements and subtitles.
      - Crosshair.


      Known issues
      - In the "Traditions of the Trade" mission, for some reason the developers chose to use the distant elements pixel shader for CLOSE elements and geometry, breaking the fix I made for them. But it's only outside of the hotel, which is a small area. The rest of the game is perfect or very close to perfect. Use the "i" hotkey here.
      - This game suffers from clipping/culling at the sides if you play in aspect ratio wider than 4:3, unless you use widescreen in a Vert- way.


      Installation
      - Download this file and extract its contents in the "Hitman Codename 47" folder, where "hitman.exe" is.
      - Download the latest dgVoodoo 2 release or WIP version here: http://dege.freeweb.hu/dgVoodoo2/dgVoodoo2.html
      - You need this exact dgVoodoo version: http://www.vogonsdrivers.com/wrappers/files/Glide/Direct3D/dgVoodoo%202/D3D11/dgVoodooWIP37.zip
      - From inside its "MS" folder, copy "D3D8.dll", "D3DImm.dll" and "DDraw.dll" into the game folder.
      - Open "dgVoodooCpl.exe" and configure it like this, for example, tuning the resolution and some other settings to your liking (I use "Force point sampled" texture filtering to get a more retro look):


      - In "Hitman.ini" (in the root folder of the game), use the following configuration, for example:

      Include Setup\Locale.zip
      //DrawDll Render3DFX.dll
      DrawDll RenderD3D.dll
      //DrawDll RenderOpenGL.dll
      SoundDll Sound.dll
      ScriptDll GSC.dll
      LocaleDLL Locale.dll
      Resolution 1024x768
      Anisotropy 2
      AntiAlias
      DisableLight
      ColorDepth 32
      ShadowDetail 2
      TextureResolution 0

      Even if it says 1024x768 there, that will only control HUD scaling and not the internal resolution. Lower resolutions like 640x480 or 800x600 will have a bigger HUD. I recommend using only those three.

      - Using that internal resolution and not any other widescreen trick, the game will be proper 16:9 thanks to the fix. F4 changes the aspect ratio in real time, but check "d3dx.ini", above the "w=0.75" line, to see the instructions.
      - Boot the game and play. The main menu will be hard to use if you are at a high convergence. It won't hurt using it in 2D temporarily.


      Hotkeys
      - p: four convergence presets.
      - F3: HUD depth presets. Screen depth by default. The crosshair uses them completely, from screen depth to max depth, but the rest of the HUD will move less into depth.
      - F4: aspect ratio presets. The default one is 16:9. The order is: 4:3, 16:9, AR for 2560x1080, AR for 3440x1440, and 48:9.
      - i: more or less geometry fix for Traditions of the Trade. Don't use it in other missions.


      Alternative widescreen mode
      - If you prefer using a Vert- type of widescreen to avoid culling, at the cost of a lower FOV, open "Hitman.ini", use your own resolution, like "Resolution 2560x1440", and add these two lines:

      Window
      StartUpperPos 0,0

      After that, open "d3dx.ini" and change "w=0.75" to "w=1", because you won't need the aspect ratio mod.


      Recommendations
      - The game isn't demanding at all, so it's a good idea to force SGSSAA in its Nvidia profile. I use 8xMSAA + 8xSGSSAA, which fixes texture shimmering when using point sampled filtering in dgVoodoo.


      If you liked the fix and want to contribute for more future fixes, you can donate to this PayPal account: masterotakusuko@gmail.com

      Saturday, November 11, 2017

      Gothic 2 [DX11]


      3D Vision fix for Gothic 2, using the DX11 renderer mod. I have Gothic 2 Gold Edition on GOG, for reference.


      Fixed
      - Lighting.
      - Shadows.
      - Fog.
      - Skybox.
      - Godrays.


      Known issues
      - Part of the skybox is cut a bit at the sides. Stretching it to cover that part would stretch the sun too, so I didn't do it.

      DX11 renderer installation
      - Follow this guide, for example, or directly go here.
      - In the end, the important part is that you need to get the "GD3D11_PreviewReleaseG2.zip" from here, and you need to extract it in the same place as the fix.
      - One of the mandatory fixes will disable speech audio and speech text in your game, so you need to go to the "Gothic 2 Gold\_work\Data\Scripts\CONTENT\CUTSCENE" folder and rename "Ou.dat" to "Ou.bin" and "Ou.isc" to "Ou.csi". That will fix it.


      Fix installation
      - Assuming that you have already installed the DX11 renderer, download this file and extract its contents in the "Gothic 2 Gold\system" folder (if you have the Gold Edition), where "Gothic2.exe" is.
      - Boot the game, and after being ingame check the F11 and ctrl+F11 (be careful to not have that hotkey for the frustum in the Nvidia Control Panel) menus to configure the graphics options. They make the game very GPU demanding (SMAA, HBAO+, dynamic shadows, tessellation, draw distance, etc). Don't let the age of the game fool you.


      Hotkeys
      - p: convergence presets.
      - F2: HUD depth presets. Screen depth by default. It's pretty much useless, because individual elements will go into depth only a bit.
      - F3: HUD toggle. It can affect the skybox, so better don't use it unless it's very on purpose.
      - F4: SMAA + sharpening toggle. Not disabled by default. You can change this with the F11 or ctrl+F11 keys that show options from the DX11 mod, but the hotkey is quicker.
      - F6: sharpening toggle. Not disabled by default. You can change this with the ctrl+F11 key that shows options from the DX11 mod, but the hotkey is quicker.


      If you liked the fix and want to contribute for more future fixes, you can donate to this PayPal account: masterotakusuko@gmail.com

      Gothic [DX11]


      3D Vision fix for Gothic, using the DX11 renderer mod.


      Fixed
      - Lighting.
      - Shadows.
      - Fog.
      - Skybox.
      - Godrays.


      Known issues
      - The fix comes with an automatic Nvidia profile that will make convergence "1" by default (apart from making the game 3D too). Change it with the "p" hotkey or your convergence key once you load/start your save to have your preferred convergence, but DON'T SAVE IT. The main menu needs convergence to be "1" so you can see it. If you make the mistake of saving convergence, don't worry, because the "p" hotkeys includes "1" as one of its presets.
      - Part of the skybox is cut a bit at the sides. Stretching it to cover that part would stretch the sun too, so I didn't do it.

      DX11 renderer installation
      - Follow this guide, for example, or directly go here.
      - In the end, the important part is that you need to get the "GD3D11_PreviewReleaseG1.zip" from here, and you need to extract it in the same place as the fix.


      Fix installation
      - Assuming that you have already installed the DX11 renderer, download this file and extract its contents in the "Gothic\system" folder, where "Gothic.exe" is.
      - Boot the game, and after being ingame check the F11 and ctrl+F11 (be careful to not have that hotkey for the frustum in the Nvidia Control Panel) menus to configure the graphics options. They make the game very GPU demanding (SMAA, HBAO+, dynamic shadows, tessellation, draw distance, etc). Don't let the age of the game fool you.


      Hotkeys
      - p: convergence presets.
      - F2: HUD depth presets. Screen depth by default. It's pretty much useless, because individual elements will go into depth only a bit.
      - F3: HUD toggle. It can affect the skybox, so better don't use it unless it's very on purpose.
      - F4: SMAA + sharpening toggle. Not disabled by default. You can change this with the F11 or ctrl+F11 keys that show options from the DX11 mod, but the hotkey is quicker.
      - F6: sharpening toggle. Not disabled by default. You can change this with the ctrl+F11 key that shows options from the DX11 mod, but the hotkey is quicker.


      If you liked the fix and want to contribute for more future fixes, you can donate to this PayPal account: masterotakusuko@gmail.com

      Friday, November 10, 2017

      F.E.A.R. 3 (DX9)

      3D Vision fix by mike_ar69 & 4everAwake


      What this does:
      - Fixes shadows, lights, bloom, lens flare, skybox, motion blur & various haloing issues
      - Removes volumetric light shafts in one level
      - Fixes a strange issue where the character's body is pushed further into depth when near walls
      - Places HUD & UI at a fixed depth
      - Adds an auto-convergence feature when wearing power armor
      - Adds a low convergence preset on the Right Mouse button.

      Remaining Issue:
      - Ambient Occlusion looks a little incorrect (can be disabled in the Video Settings menu)

      Installation:
      1. Download this ZIP file and extract the contents into the game directory.
      2. If you are using a controller, use a controller mapping program (such as Xpadder or Joy2Key) to bind the 'P' key to the left trigger (for aiming).
      3. Run the game using the included shortcut "F.E.A.R. 3- Helixmod.bat"
      4. In the Options -> Video Settings menu, set "Resolution" to "1920x1080" or higher. All other graphics settings can be set to the highest.
      5. In the Control Settings menu, set "Toggle Zoom" to "Off".
      6. In Control Settings -> Keybindings -> Fettel, change the primary key for "Suspend" to another key (such as a side mouse button-- Mouse 4).
      7. Once inside a level, press the 'Caps Lock' key and adjust the convergence & depth to your liking. Save your settings by pressing the 'F7' key.
      Important Note:
      - If you're getting a black screen in one eye, try deleting the "F.E.A.R. 3" profile in Nvidia Inspector.