Showing posts sorted by date for query dgvoodoo2. Sort by relevance Show all posts

Sunday, June 14, 2026

Star Wars Episode I: Racer


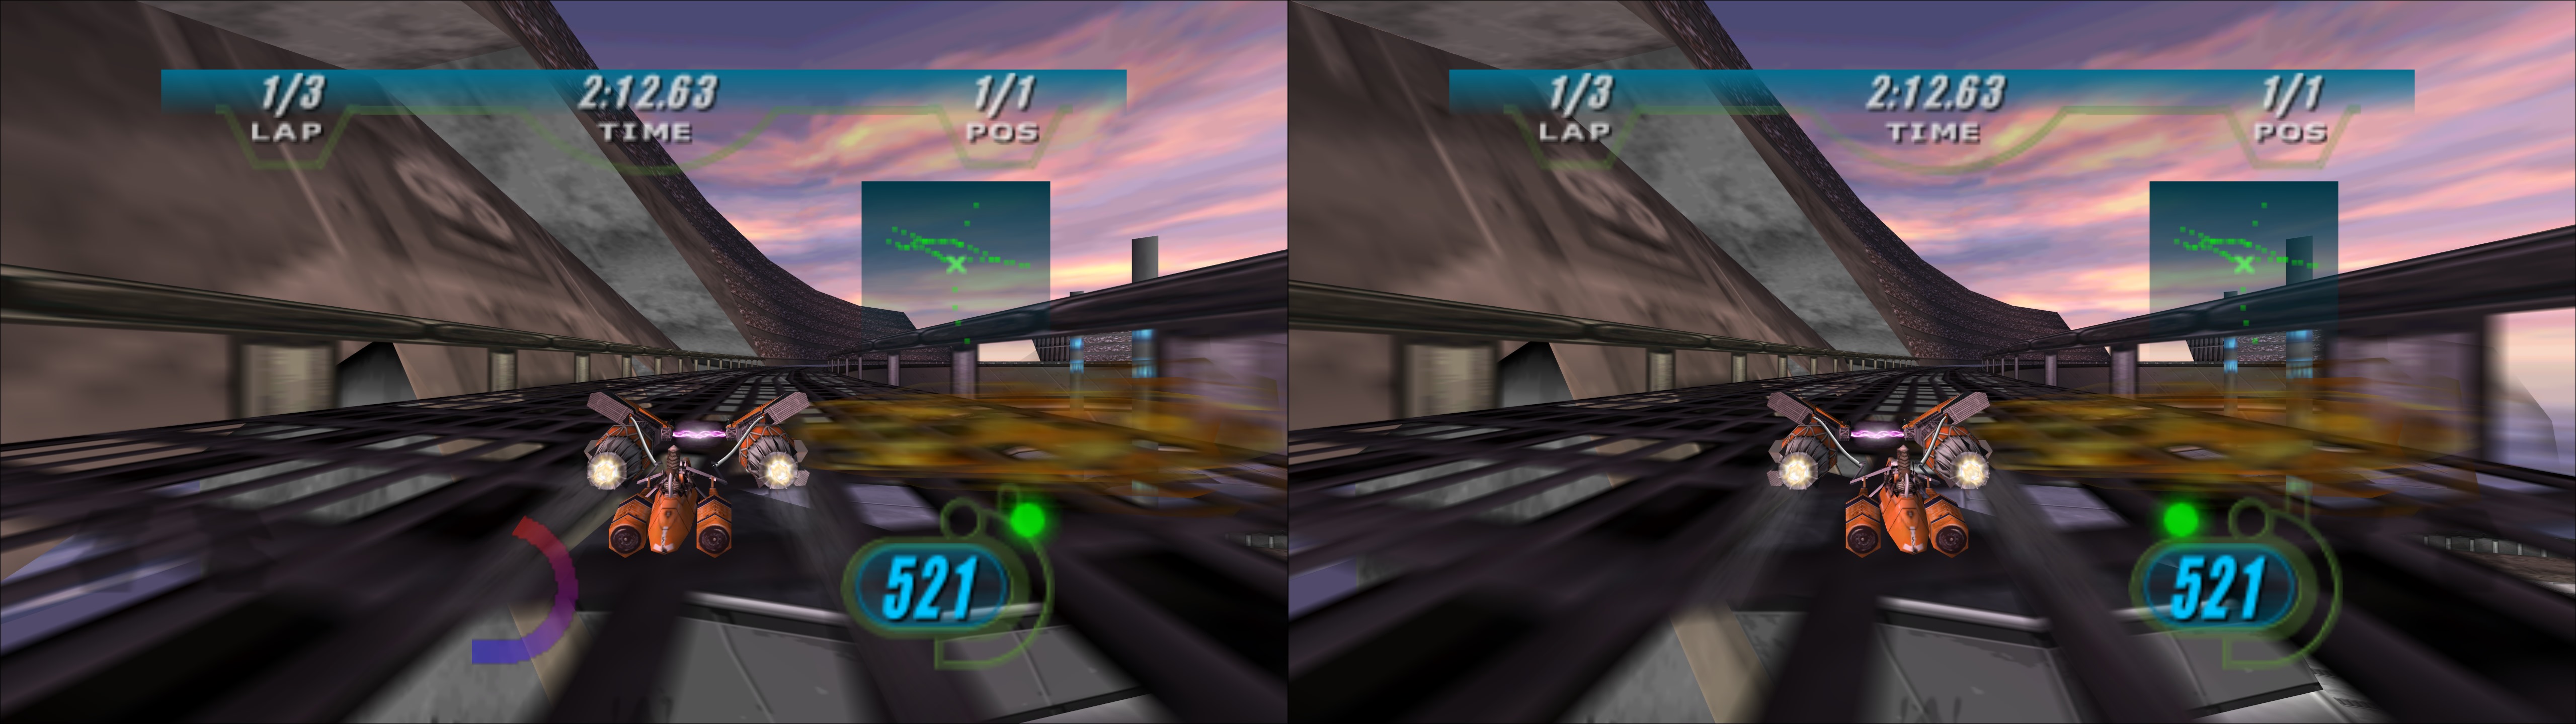
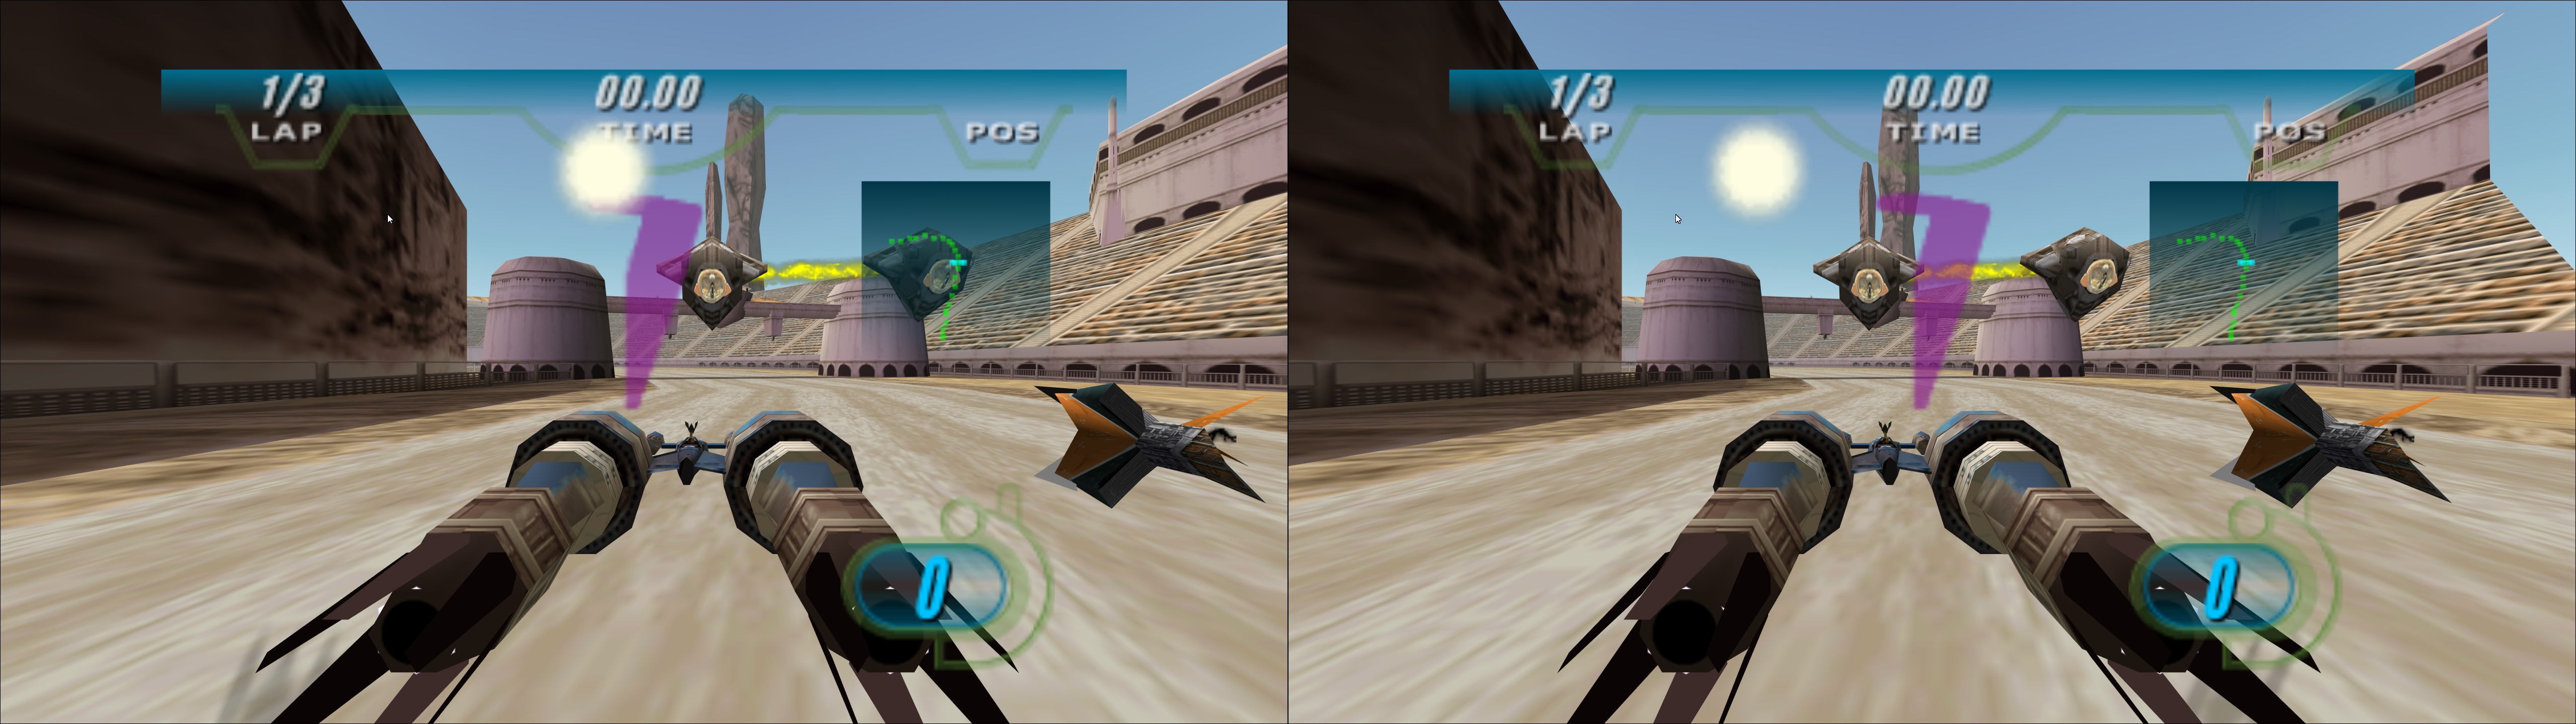
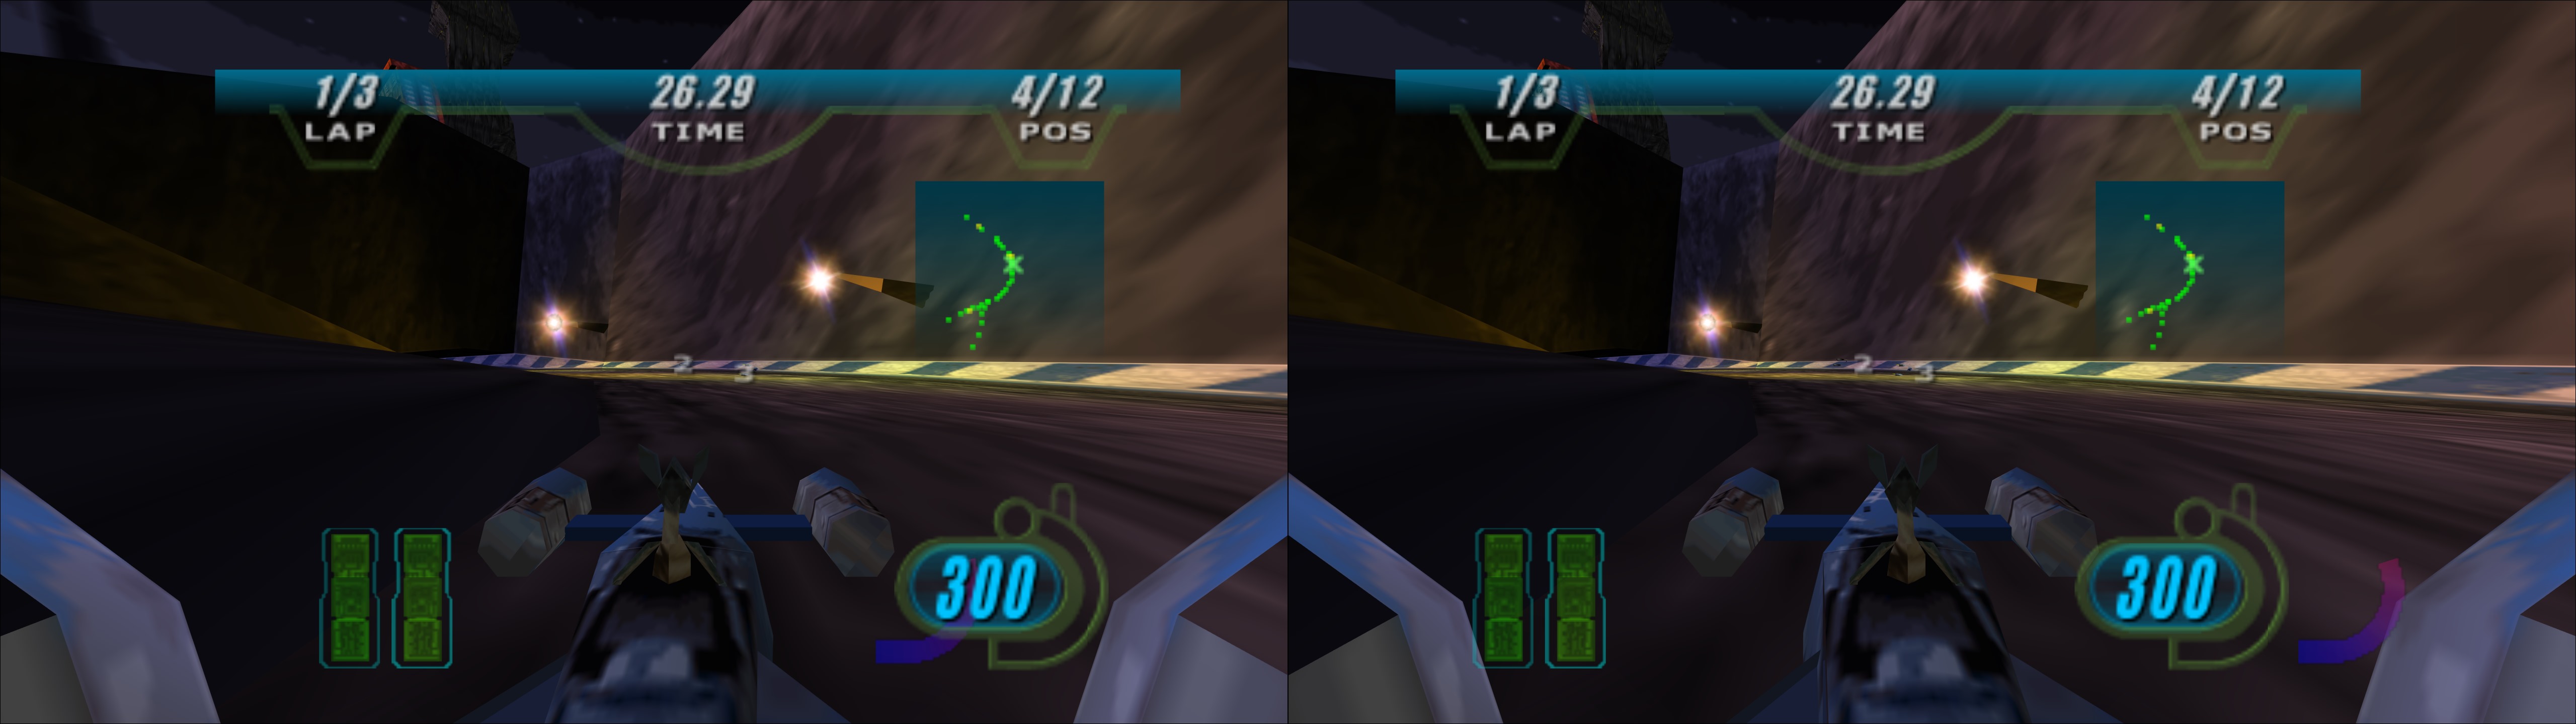
3D Vision and geo-11 fix for Star Wars Episode I: Racer (GOG release). It includes an aspect ratio mod that I did via shaders. The fix needs dgVoodoo to convert the game to DX11. There are some unavoidable compromises with the fix related to the HUD and geometry.


Update (2026-06-15): added geo-11 fix. Read the differences below.


NEW GEO-11 FIX INFORMATION HERE


Differences from the 3D Vision fix:
  • The fix now requires dgVoodoo 2.87.2 (latest one at this date). At some point it won't be available from the official source, so I backed it up in a github project.
  • Default convergence is now 6 instead of 3. I think it was too low. You can change the dm_convergence value in d3dxm.ini.
  • Three convergence presets instead of 5. They are for 3, 6, and 12 convergence.
  • The "4" hotkey now has 3 presets. By default, the HUD will be fully correct. Some rare track textures may have a bit of a weird depth unless you press 4 twice to make the HUD fly away with convergence.
  • upscaling = 1 is enabled by default in d3dxdm.ini. I found it to be the most stable.
  • I disabled the HUD toggle hotkey, because it has a risk of disabling some geometry.


-------------------------------------------------------------------

OLD 3D VISION FIX INFORMATION BELOW


Fixed
- Most of the HUD at fixed depth (see the notes after the installation steps).
- Fixed "layer" was making 3D broken at high convergence levels.
- Sun and lens flares now at full depth.


Remaining issues
- Shadows are unfixed. They seem to not have depth information, and even if they had it, they still share their texture hashes with other geometry (I tried to do a manual approximation and it backfired).
- By default I have left the boost meter at a non fixed depth to not compromise geometry. You can probably still see it with one eye somewhere on the screen. If you want to fix the meter, open "d3dx.ini" and uncomment the "[TextureOverrideHUD3]" line and the two lines below it.
- Some slight geometry accuracies (affecting a few textures) had to be made to fix the HUD. See the notes below the installation steps.
- WARNING: trying to enable SBS/TAB/interlaced modes will crash the game, even if you configure the mode beforehand. You have to play with normal 3D Vision unless you find (and hopefully share) a way to make it work.


Installation
- First configure the game resolution the normal way. I recommend the default 640x480 for better CPU performance and full size videos.
- Download this file and extract its contents in the "STAR WARS Racer" folder, where "SWEP1RCR.EXE" is.
- Download the latest dgVoodoo 2 release or WIP version (at least 2.55.1 version) here: http://dege.freeweb.hu/dgVoodoo2/dgVoodoo2.html
- From inside its "MS" folder, copy "D3D8.dll", "D3DImm.dll" and "DDraw.dll" into the game folder. The GOG release of this game comes with a "ddraw.dll" that makes the game DX9, so rename it to something else if you don't want to lose it.
- Open "dgVoodooCpl.exe" and configure it like this, for example, tuning the resolution and some other settings to your liking:


- It's important that you enable "Fast video memory access" to remove a big CPU bottleneck.
- Open "dgVoodoo.conf" and set "DepthBuffersBitDepth" to "force32bit" to have the best geometry accuracy, avoiding the annoying "z fighting" problem.
- Boot the game directly from "SWEP1RCR.EXE", making sure you have admin rights to save the game profile changes it makes the first time. If I launch it from GOG Galaxy it doesn't trigger 3D Vision.


HUD and geometry compromises
The problem of this game is that it has just a handful of texture hashes shared between geometry, shadows, lens flares and HUD. Even with a very narrow depth check (to see if it's exactly 0, for the HUD), it can still affect geometry. I tried to give the game the best balance between these things, but you can change how it's configured (experienced users only).

Open "d3dx.ini" and go to line 996, right before "[TextureOverrideHUD1]". Take a look at those blocks of text until line 1047. By default, I made the game unstereoize (i.e. put at screen depth) everything that has zero depth. Blocks that contain "filter_index=2" will avoid this and in some cases affect the HUD (other times it has no drawbacks). The block I have with "filter_index=1" is the lens flares and sun fix, putting the effect at full depth.

For example, if you want to fix the boost meter, comment the "[TextureOverrideHUD3]" block. But some geometry will have wrong depth.

For a quick general change to disable all HUD fixes in real time (but make the HUD convergence dependant), press the "4" hotkey.


Hotkeys (numbers are not from the numpad)
- 1: five convergence presets .
- 2: HUD depth presets. Screen depth by default, and tweaked for the HUD inside races.
- 3: HUD toggle. Not disabled by default. Only HUD elements with fixed depth will be affected. Sun and lens flares (and some HUD affected by it) won't be disabled.
- 4: press this to disable all HUD tweaks, making geometry perfect (except the always unfixed shadows) at the cost of probably not seeing the HUD if you use enough convergence.
- 5: aspect ratio mod presets (4:3, 16:9, 2560x1080 AR, 3440x1440 AR, 48:9). By default 4:3 to 16:9 conversion.
- 6: Y axis FOV unlock toggle. Use it alongside the "5" key to configure the zoom level. By default it assumes you are using a 16:9 resolution.
- 7: Y axis FOV multiplier, to use alongside the "5" and "6" keys. Use it to change aspect ratio at the same time as using zoom.


Aspect ratio mod
Use the 5, 6 and 7 hotkeys to change settings in real time.

In "d3dx.ini", line 94, there is a line that says "w=0.75". That's the X axis FOV. By default I assume you are using a 16:9 resolution, so "0.75" will unstretch the game, as you see in the screenshots above. The HUD is centered and unstretched too. The drawback of this mod is that there is some geometry culling, especially if you use higher than 16:9 aspect ratio. Also, the HUD will change its size accordingly. Extreme example of the max level of zoom I allow: screenshot.


Recommended settings
- In the "Video Settings" launcher (from GOG Galaxy or the "-v" command in a shortcut), use 640x480 resolution.
- Someone here posted better settings that can't be accessed ingame:
"Go to:
x:\GOG Folder\STAR WARS Racer\data\config\current
Open video.cfg with Notepad++ or similar and change the settings to enable max settings:

VIDEO REFLECTIONS=ON
VIDEO ZEFFECTS=ON
VIDEO DYNAMIC_LIGHTING=ON
VIDEO VSYNC=ON
VIDEO LENSFLARE=ON
VIDEO ENGINEEXHAUST=ON
VIDEO TEXTURE_RES=3
VIDEO MODEL_DETAIL=3
VIDEO DRAWDISTANCE=3 "
- Use Nvidia Profile Inspector to force 8xSGSSAA or 4xSGSSAA if your GPU can handle it. It will reduce texture shimmering a lot.


If you liked the fix and want to contribute for more future fixes, you can donate to this PayPal account: masterotakusuko@gmail.com

Sunday, April 26, 2026

Mount & Blade Warband dgVoodoo2 + Geo 11 fix

Specials thanks to Masterotaku, always there helping me

Geo-11 fix for Mount & Blade Warband. The game originally runs in DX9 and already works for 3D Vision, but I wanted to make a DX11 fix to not depend on 3D Vision drivers and dynamic depth for mouse and crosshair. This requires dgVoodoo to convert the game to DX11.


Fixed:
Halos from lights and smoke.
Crosshair at dynamic depth.
Mouse cursor at dynamic depth.
Reflections at real depth.

Installation
    Geo-11: download this file https://cicicleta.s3.us-east-1.amazonaws.com/MountBlade+Warband.zip  and extract its contents into the "Mount and Blade Warband" folder. Remember to edit "d3dxdm.ini" to change your "direct_mode" to the output you need. It is set to "sbs" by default. katanga_vr doesn't work for me. nvidia_dx11 mode explained further below.
    Install dgVoodoo (v2.86.2 is the version I used for this game). Copy the "MS\x86\D3D9.dll" file to the folder where you installed the fix. Then run "dgVoodooCpl.exe" to configure dgVoodoo similarly to this:


    This game has a launcher that does not work well when geo-11 is active (mouse is not showed). I recommend configuring the game first without geo-11 active, and then installing geo-11 afterward. If you later need to change something in the launcher with geo-11 already installed, just rename the d3d11.dll file to something else (e.g. --d3d11.dll), make your changes in the launcher, and then rename it back to its original name.
These are the values that work best for me.


    It is very important not to use antialiasing (dynamic depth stops working if you do).
    If you are going to use the nvidia_dx11 output mode, there are additional steps to configure, which I explain further below.
This fix works with the game's native mode. It is configured to support the "Clash of Kings" mod, but crashes occur fairly often with mods in general. With other mods that modify textures, the fixes will not work correctly.

nvidia_dx11 output:
Uncomment this line → swap_effect = 4 to enable the 3D effect.
"Clash of Kings"  Crashes with nvidia_dx11 output mode (any problem related to VRAM)
 
Hotkeys
k: Change the depth of the interactive box (in front of the character).

This fix it's for game's Native Mode. I have tested "Clash of Kings" mod in three PC:
-GTX 1660 : "Clash of Kings"   works in sbs mode.
-GTX 1050 : "Clash of Kings"  works in sbs mode.
-RTX 4060 : "Clash of Kings"  doesn't work. Works  commenting this line  ;allow_create_device=1 in d3dx.ini

    In any case, the mod crashes a lot due to the large load of textures that the dx9 system is not prepared to withstand. (I think)


Thursday, August 11, 2022

Tron 2.0 Geo-11 3D fix. DX9 - DX11 dgVooDoo2


 Greetings Programs,


I have a fun fix here that works pretty good out the box. I had ran a mod called Killer 
App Mod for Tron 2.0. I had found it worked well when running the dgVooDoo 2 and in a Katanga window with a Reverb G2 VR Headset.


Now this should work with other 3D solutions but I have only tested the Katanga_VR Mode and a G2 VR Headset. but with it being converted to DX11 it should work on most all solutions I would hope..


But before we get started you can get the Game on Steam I think also GOG.. The Killer App Mod can be found by going to this Guide page on Steam:

https://steamcommunity.com/sharedfiles/filedetails/?id=325088441


The guide on Killer App Mod site cover most of the issues you could run into but I am not going to cover that here, just read the guides and mod website for help. but if you do have a question I will try and help.


Now, All I did was install Tron2.0 then downloaded the patch and then the killer app mod and installed them. I will supply the shortcut I used for Katanga, I use Helixvision so I am not sure if you need that or not to get the Katanga app??


But Helixvision is only like 5bucks and well worth the cost. Not sure if you get 3DFM if that comes with the Unity App Katanga??


But without further ado here is the Katanga Shortcut target line dont forget you may need to purchase Helixvision, and if you put the game into a different location you will need to change the shortcuts Target line to where you installed. here is an example of the target line:

C:\Games\Steam\steamapps\common\HelixVision\Tools\Katanga\katanga.exe --game-path C:\Program Files (x86)\Buena Vista Interactive\Tron 2.0\Tron.exe --launch-type DX11Exe

So you would insert your Patch and install where Tron 2.0 is like above from here C:\Program Files (x86)...... or if you just want to make your own Shortcut from Bo3b Himself..


https://www.mtbs3d.com/phpBB/viewtopic.php?t=26326


Also, here is a link to the dgVooDoo 2 website:


http://dege.freeweb.hu/dgVoodoo2/dgVoodoo2/


here is a link to the Geo 11 fix which includes dgVooDoo2 if you need to manually install it. I will also include the folder for Helixvision.  


https://nephilim3d.s3.amazonaws.com/Tron+2.0+Geo-11+3D+fix.7z


here is the Helixvision folder. just put it inside the fixes folder where you installed Steam/Helixvision at:


https://nephilim3d.s3.amazonaws.com/1254.7z


Well it is a fun game and I am gonna try some MP hope to see you on the inside. if you have any questions let me know..


Donations welcome jlaf2112 AT Gmail Dot Com


Thank you

Nephilim


Tuesday, July 21, 2020

Might and Magic VIII: Day of the Destroyer

Use dgVoodoo to convert the game to DX11:

  • Download and unzip dgVoodoo to any folder you choose

  • From “MS/x86” folders copy “D3D8.dll”, D3D9.dll”, “D3DImm.dll” and “Ddraw.dll” and place them to the game’s installation folder where “MM8.exe” is located

  • Launch dgVoodoo and Set Config folder/Running instance: “folder where your game’s exe file is located”

GENERAL tab:

  • Output API: Direct3D 11 (feature level 11.0)

  • Adapter(s) to use/enable: "Your graphics card"

  • Full Screen Output: \\.\DISPLAY 1

  • enable "Full Screen"

  • enable "Enumerate refresh rates"

  • Leave everything else as they are

DIRECTX tab:

  • Videocard: dgVoodoo Virtual Accelerated Card

  • VRAM: set to highest available (amount depends on dgVoodoo version)

  • Resolution: set to your monitor's highest as long as it's 119Hz

  • Filtering and Antialiasing as you prefer (I use “Force anisotropic 16x” and Antialiasing: “Off”).

  • Leave everything else as they are

In dgVoodoo settings be sure NOT to enable "Fast video memory access", it will crash the game.


Make shortcut of MM8.exe to your desktop.

Right click on MM8-shortcut and select “Properties”. Then select “Compatibility” tab and make followin selections:

- Windows 8 compatibility mode, disable full-screen optimisations and run as administrator.


In Nvidia Profile Inspector create new profile and add MM8.exe to it.

Set "StereoProfile" to "Yes"

Then set “ StereoTextureEnable” to “0x00000001 COMMON_STEREO_TEXTURE_ENABLED”


Go to game-folder and run MM7Setup.exe. In Might and Magic Configuration Utility that launches, select “Full Screen”, enable “Hardware Accelerated 3D” and from drop-down menu select “dgVoodoo DirectX Wrapper”

Exit MM Configuration Utility and launch game from the desktop shortcut you made earlier.


dgVoodoo: http://dege.freeweb.hu/dgVoodoo2/dgVoodoo2.html

Nvidia Profile Inspector 2.13: https://www.filecroco.com/download-nvidia-inspector/


Might and Magic VII: For Blood and Honor

Use dgVoodoo to convert the game to DX11:

  • Download and unzip dgVoodoo to any folder you choose

  • From “MS/x86” folders copy “D3D8.dll”, D3D9.dll”, “D3DImm.dll” and “Ddraw.dll” and place them to the game’s installation folder where “MM7.exe” is located

  • Launch dgVoodoo and Set Config folder/Running instance: “folder where your game’s exe file is located”

GENERAL tab:

  • Output API: Direct3D 11 (feature level 11.0)

  • Adapter(s) to use/enable: "Your graphics card"

  • Full Screen Output: \\.\DISPLAY 1

  • enable "Full Screen"

  • enable "Enumerate refresh rates"

  • Leave everything else as they are

DIRECTX tab:

  • Videocard: dgVoodoo Virtual Accelerated Card

  • VRAM: set to highest available (amount depends on dgVoodoo version)

  • Resolution: set to your monitor's highest as long as it's 119Hz

  • Filtering and Antialiasing as you prefer (I use “Force anisotropic 16x” and Antialiasing: “Off”).

  • Leave everything else as they are

  • Press “Apply” and the “OK”

  • Close dgVoodoo

In dgVoodoo settings be sure NOT to enable "Fast video memory access", it will crash the game.


Make shortcut of MM7.exe to your desktop.

Right click on MM7-shortcut and select “Properties”. Then select “Compatibility” tab and make followin selections:

- Windows 8 compatibility mode, disable full-screen optimisations and run as administrator.


In Nvidia Profile Inspector create new profile and add MM7.exe to it.

Set "StereoProfile" to "Yes"

Then set “ StereoTextureEnable” to “0x00000001 COMMON_STEREO_TEXTURE_ENABLED”


Go to game-folder and run MM7Setup.exe. In Might and Magic Configuration Utility that launches, select “Full Screen”, enable “Hardware Accelerated 3D” and from drop-down menu select “dgVoodoo DirectX Wrapper”

Exit MM Configuration Utility and launch game from the desktop shortcut you made earlier.


dgVoodoo: http://dege.freeweb.hu/dgVoodoo2/dgVoodoo2.html

Nvidia Profile Inspector 2.13: https://www.filecroco.com/download-nvidia-inspector/


Monday, April 8, 2019

F-22 Total Air War - TAW

3Dvision F-22 Total Air War  Fix        April, 2019
by Rubini (aka arubinig)
(first of all, excuse me my english, isn't my native language) 


TAW is an old 1998 directx 5 game, made to run with 3Dfx Glide boards to get its best. It have one of the best compromise between Dynamic Campaigns and a sim playability until today. This is why we love it. 
Today, to run it well and with good resolution we need a Glide wrapper. This last dgvoodoo2 runs it at Dx11 and with the same good visuals as an old 3Dfx glide board. Being "now" a Dx11 game,  3Dvision and 3Dmigoto can push it to a real stereo 3D game! Just a impossible thing before.

Here more pics to you see how it most be if all is correctly installed - use Nvidia 3D Vision Photo Viewer for best result. Note that the lateral bars in game will gone pressing Ctrl+F11:


A. What you need:

1. F-22 TAW 2.30 mod installed

2. dgvodoo 2  2.45 (seems that don't work well on newer versions)
http://dege.freeweb.hu/dgVoodoo2/dgVoodoo2_45.zip


(don't use reshade or SweetFX for now. They can conflict with 3dmigoto 1.3.x (at least this happens here). You can try to enable then later after this install and have tested all this stuff a bit. Anyhow with the settings explain below will be no need to run shaders enhances like these. The visual result is already the best)


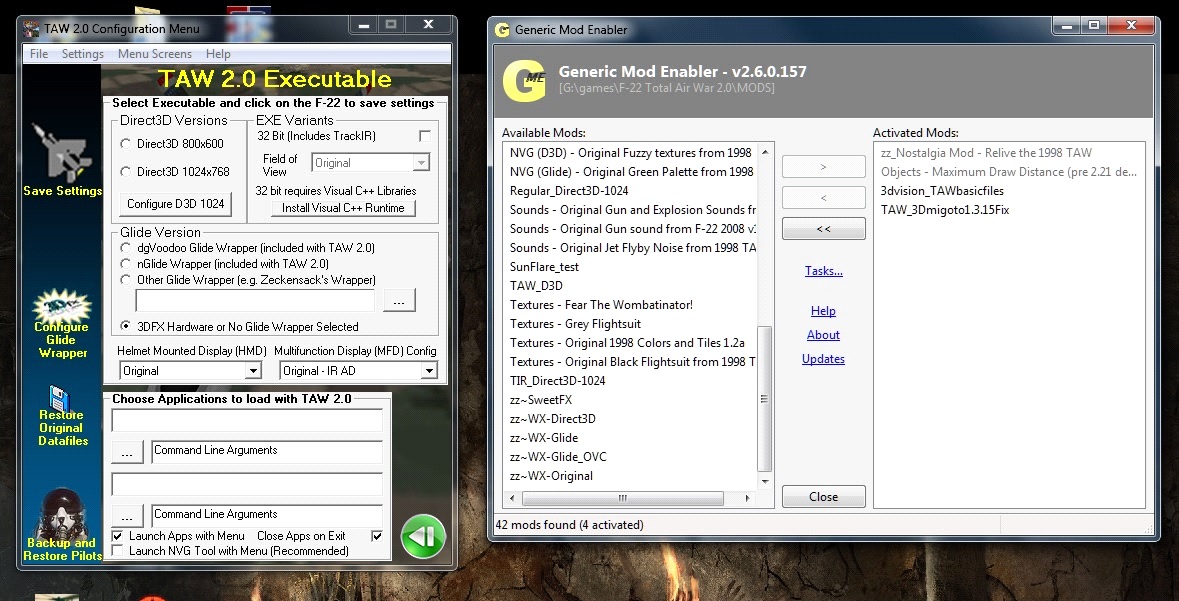
B. Install F-22 TAW 2.30 mod as explained on its own directions. Set its wrapper sections like this (at left) pic:


Note that you will not install any wrapper by the  TAW Menu (taw launcher)  - it will be replaced by the new one that you download above.  If you already have installed any by the TAW Menu (taw launcher) just set as above that it will be uninstalled automatically.


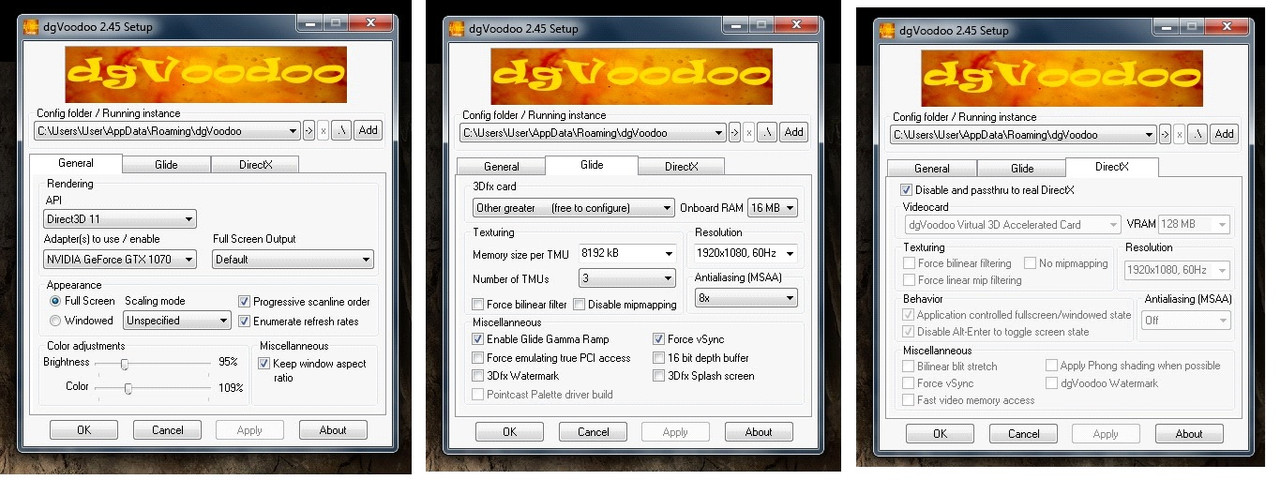
C.  Unzip dgvodoo 2 2.45 at any place on your computer (can be, but not mandatory, on the F-22 TAW install folder itself). Run dgVoodooSetup.exe once (from the folder that you unzip dgvodoo 2 2.45) and set as the pic below.  Then close  it.


D. Now unzip that two mods files (3dvision_TAWbasicfiles and TAW_3Dmigoto1.3.15Fix) on the  ...\F-22 Total Air War 2.0\MODS. Then run JSGME.exe (from the F-22 TAW install folder) and enable these two mods as this (at right) pic:


Note that both Nostalgia mod and Objects Max Draw Distance mod in this pic are totally optional (comes with the F-22 installer and are optional). BUT ALWAYS enable the two 3Dvision mods for last.

3dvision_TAWbasicfiles  will install f22 executables (already glide, widescreen and TIR), glide.dlls, some 3D fixes and help files like this one
TAW_3Dmigoto1.3.15Fix install 3Dmigoto v1.3.15,  the Vertex Shaders that fix the game and d3dx.ini that have the special key profiles among others few files.


E. Now install Nvidia Inspector i(f you yet don't have it installed).
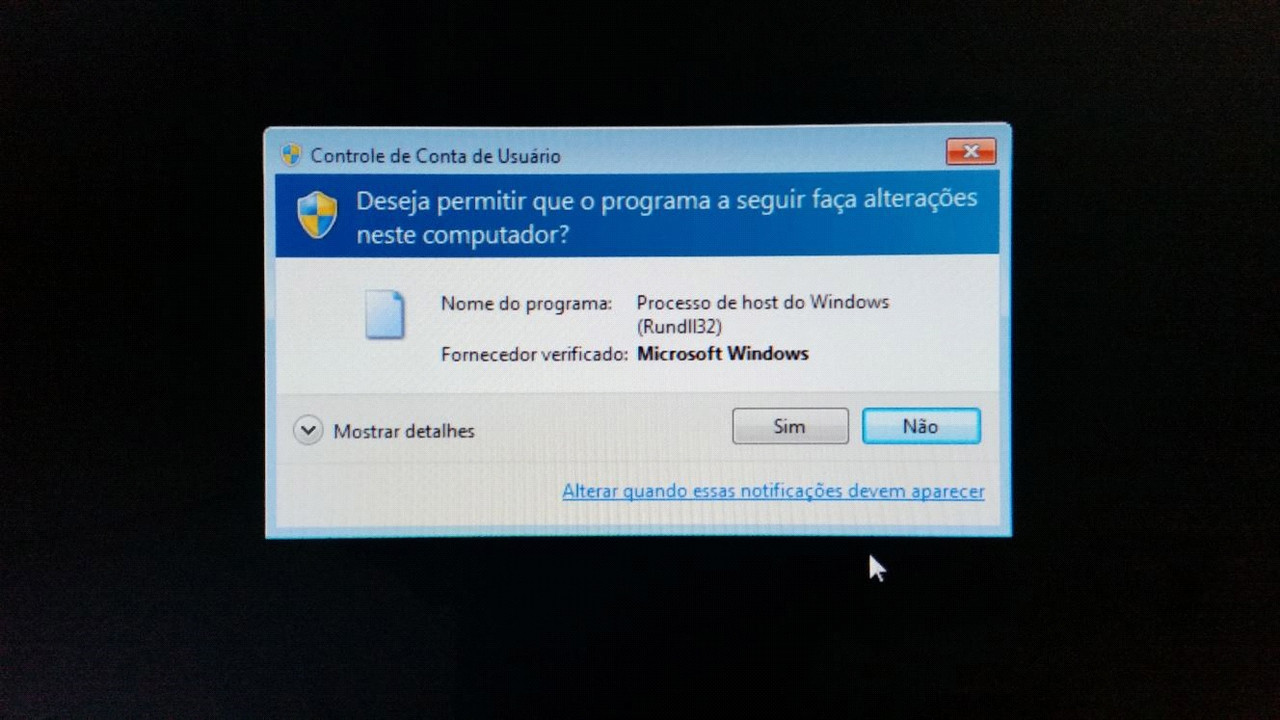
Note:  For win 8 and below can be necessary to run TAW one first time to its profile appears on Nvidia Inspector. So, after install nVidia Profile runs the game once. Windows 8 and below probably  will ask you about  Rundll32 when enters in any mission into the game for the first time (note: just once,  for the first time):


Just allow it, enters into the game and quit. After that you probably already have a Nvidia Profile for TAW as below.
So let's continue. 

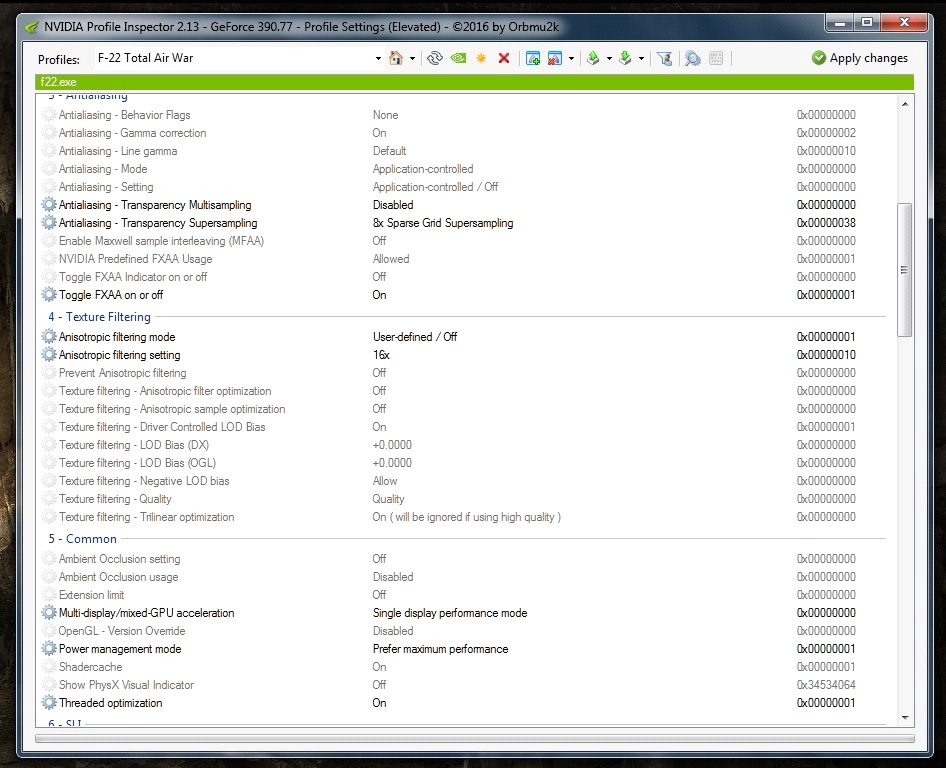
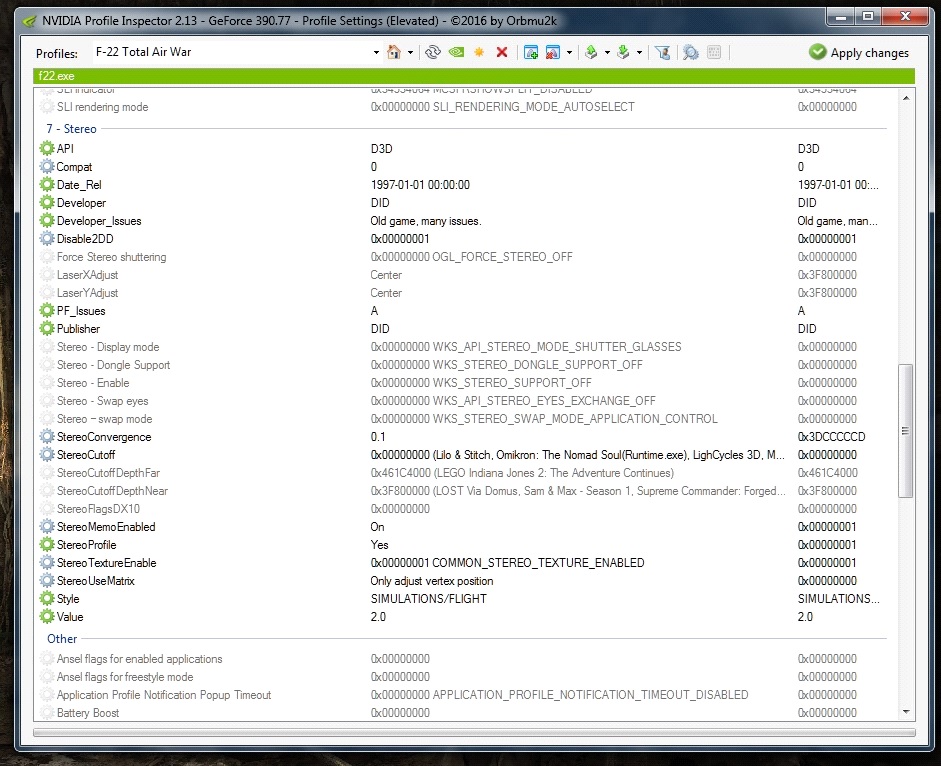
Open Nvidia Profile, locate and open  the F-22 Total Air War profile  and adds the f22.exe as its executable if it is not already ( not _f22.exe, pay attention!).  This f22.exe was installed from the 3dvision_TAWbasicfiles  mod that you did on the "D" section just above. See the pic below . Note the f22.exe at the first line (again not _f22.exe!!!). The settings on this pic  are my suggested settings for TAW profile to get the best image into the game. Dgvodoo 2  2.45 will run TAW in dx11 so AA will not work from the profile. But these sets are enough to give to the game a excellent visual. Note that dgvodoo itself will apply 8x AA to the game.


Yet on TAW profile, look below on section 7 - Stereo, you must have these settings below. Note that 3Dmigoto  (that you installed on section D above)  already setted it automatically when you run the game first time:


If you yet don't have these sets above, just run the game again and it must do it automatically.
Well that is it. Now when running the game at any time in mission (3Dvision will not kick in at menus) press Crtl+T and the stereo magic comes in. A doubled image will appears. Just put your stereo glasses and see it!


F. 3Dvision and 3Dmigoto special controls into the game:

1. Controls for 3DVision into any game (by nvidia 3Dvision driver itself):
- Ctrl+T: enable 3D
- Ctrl+F11: to adjust that sided bars in some 3D games (TAW needs it, so press  it 2 or 3 times  until the side bars disappears)

2. 3Dmigoto is a wrapper that allows us to fix the vertex and pixel shaders that are not fixed automatically by 3Dvision drivers. It also allows us to create complex profiles that automatically changes things like convergence/separation for different scenes of the game like cockpit, external views, MFDs,  etc. Also some new  special keys and functionalities can be   added to the game. So, 3Dmigoto will changes automatically TAW convergence for your eyes confort when into cockpit or external views or even for MFDs views. Also the HUD and any other Text in game will be adjusted automatically, providing always a good and comfortable 3D view. So no need to use these below keys but they are here if you need them eventually.

- key Home:              set the convergence to  cockpit standart (this is a very safe set that will not have any glitch in game)
- Key End:                  cycles  the convergence to  external view  low convergence and  the standard one
- Key Ctrl+PgUp:       allows  the holograph mode. This is a plus on this fix. The Plane on external views will seems to fly out of your monitor! Looks a model toy and seems that you can catch it with your hands. Very cool!. And the game is totally playable too.
- Key Ctrl+PgDown:  turn all text off. Good for look at the game in external views with clean screen. Also to  make pics. Note that the game already have a key that adjust the HUD on off for the same effect in cockpit views.
- Key Ctrl+0 (zero):   brings more convergence to the game. The 3D effect is yet better. Useful for external views and can be used also on holograph mode.
- Key Ctrl+F10:         resets 3Dmigoto profile if anything goes wrong. The convergence is set to cockpit standard for safety.


G. Final comments:

Well, nothing is perfect, some effects aren't find in Vertex or Pixel shaders and  can't be fixed by 3Dmigoto - or at least by me :).
- Lens flares
- Some smoke effects
- Planes and vehicles tires
- Sun glare in some views
- High G effects on screen

So these are partially or totally disabled automatically  when running in real stereo 3D and will not affect the gameplay neither you will really notice them.
(Note that in low convergence (for example in cockpit or external view keys explain above) tires, smoke and lens flare are all  correct. The problem is just when using high convergences - which  is the best 3D effect. So use them as you like.)

Running a game in a real stereo 3D make it much better in immersion and beauty.  And TAW is not an exception!
Good hunt into the sky!
Rubini.

My system for reference: win7 64bits, 16gb, i7 4790k, gtx 1070 8gb, nvidia driver 390.77, Philips Gioco 27"  passive 3D

EOF============================================================================


Tuesday, August 28, 2018

Nintendo 64 (Jabo's Direct3D plugin) [DX11]


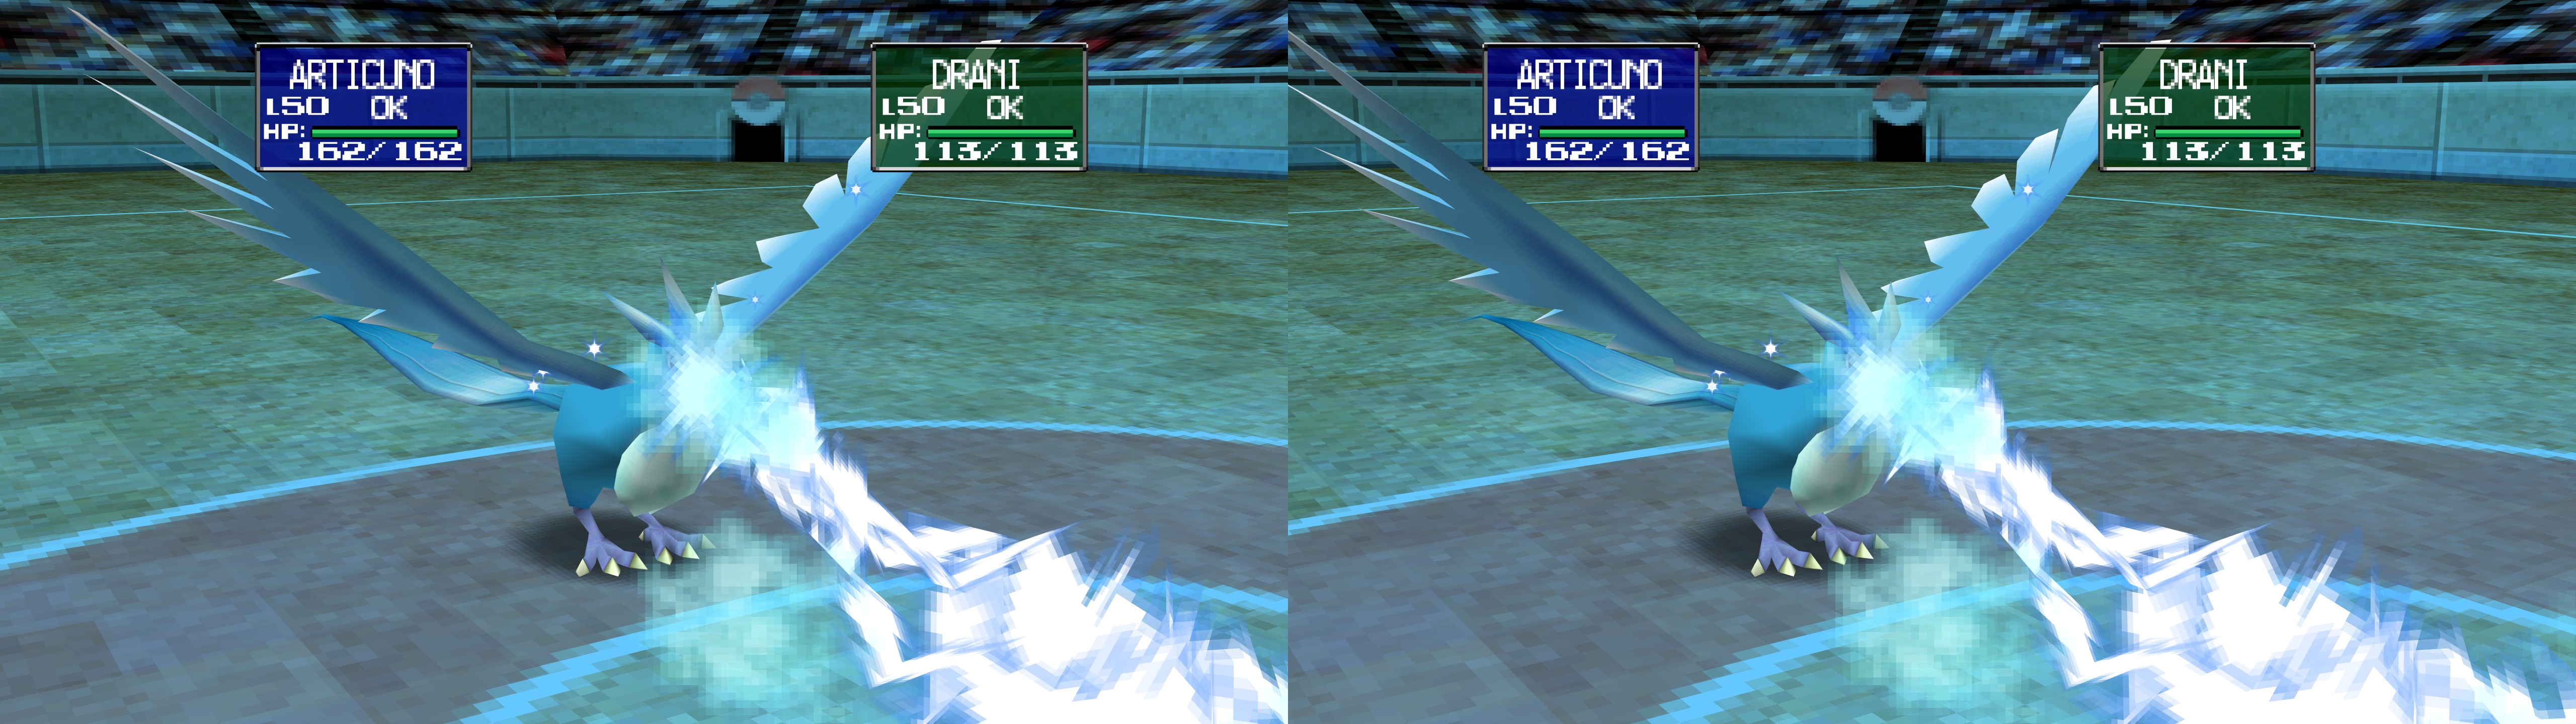
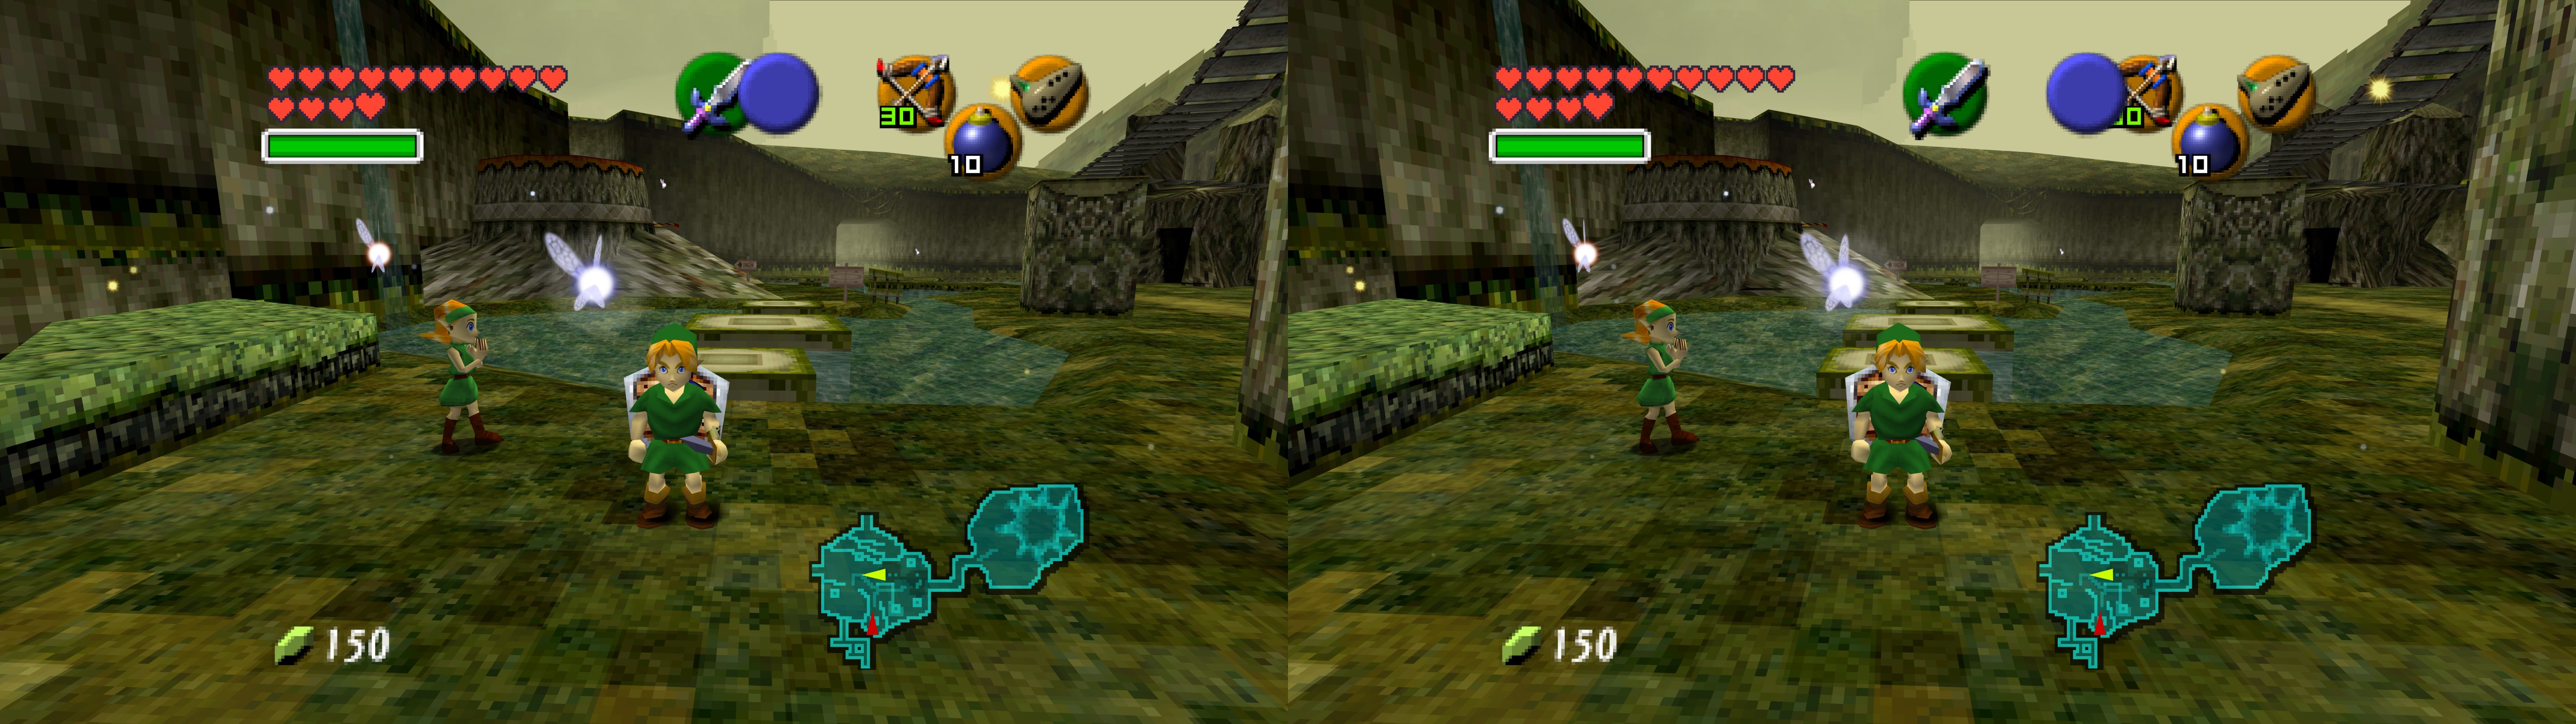
3D Vision fix for the Jabo's Direct3D Plugin (DX6, DX7 and DX8) that can be used in Nintendo 64 emulators. The fix needs dgVoodoo to convert the game to DX11. Tested with dgVoodoo 2.55.1 and 2.55.3, and with the Project 64 emulator (version 2.3.2).


Compatible Jabo versions
- Jabo's Direct3D8 1.6.1 (recommended)
- Jabo's Direct3D8 1.6
- Jabo's Direct3D7 1.40
- Jabo's Direct3D6 1.5.2


Fixed
- After being converted to DX11, all Jabo versions have HUD depth, HUD toggle, convergence, and aspect ratio features.
- Profile settings to make it work correctly in 3D.


Known issues
- If you use the DX8 version of the plugin, you can only enable fullscreen once. If you exit it and enter again, the emulator image will freeze until it's in a window again. Close and open the emulator again when this happens.
- In Project64, you must open a ROM from your ROM list or from the recent list. Opening one from "File -> Open ROM" will result in 3Dmigoto not loading, thus losing HUD and convergence hotkeys.
- IMPORTANT: the SBS/TAB/interlaced shader doesn't work, so you are limited to 3D Vision, 3D Vision Discover and 3DTV Play. If I try to use it, it freezes the emulator and then locks up my PC after I try to close the emulator or kill its process.


Installation
- Have Project64 ready with at least one of the plugins I mentioned.
- Download this file and extract its contents in your emulator folder, where for example "Project64.exe" is.
- Download the latest dgVoodoo 2 release or WIP version (at least 2.55.1 version) here: http://dege.freeweb.hu/dgVoodoo2/dgVoodoo2  
- From inside its "MS" folder, copy "D3D8.dll", "D3DImm.dll" and "DDraw.dll" into the emulator folder.
- Open "dgVoodooCpl.exe" and configure it like this, for example, tuning the resolution and some other settings to your liking (uncheck the "Behavior" checkboxes just in case):


- Open the emulator and configure the graphics plugin like this (assuming the DX8 version. Use your own resolution. The last image shows the aspect ratio override to get 16:9 or whatever you use natively):


- Open a ROM from your ROM list or the recent list (mandatory to make 3Dmigoto load).
- Let the program apply the profile changes the first time you run it.


Hotkeys
- k: convergence presets (very game dependant).
- l: aspect ratio mod. In this order, assuming a stretched 4:3 image, these are the presets: corrected 16:9, non corrected triple monitor, corrected triple monitor, default. You don't need this if you use the widescreen hack of the DX8 plugin.
- o: HUD depth presets (usually). Whatever has 0 depth goes to depth.
- i: HUD toggle.
- p: same functionality the HUD depth presets, but with a depth value that catches the skyboxes of Super Mario 64 in the DX7 and DX8 plugins. It's at full depth by default.


Recommended settings
- Use Nvidia Profile Inspector to force 8xSGSSAA if your GPU can handle it. It will greatly reduce texture shimmering, especially if you use point filtering in dgVoodoo.


I have only properly tested Project64, but other emulators that work with the Jabo plugin may work with dgVoodoo and the fix. Please report success/failure to use this with other emulators.


If you liked the fix and want to contribute for more future fixes, you can donate to this PayPal account: masterotakusuko@gmail.com

Sunday, June 24, 2018

Thief Gold


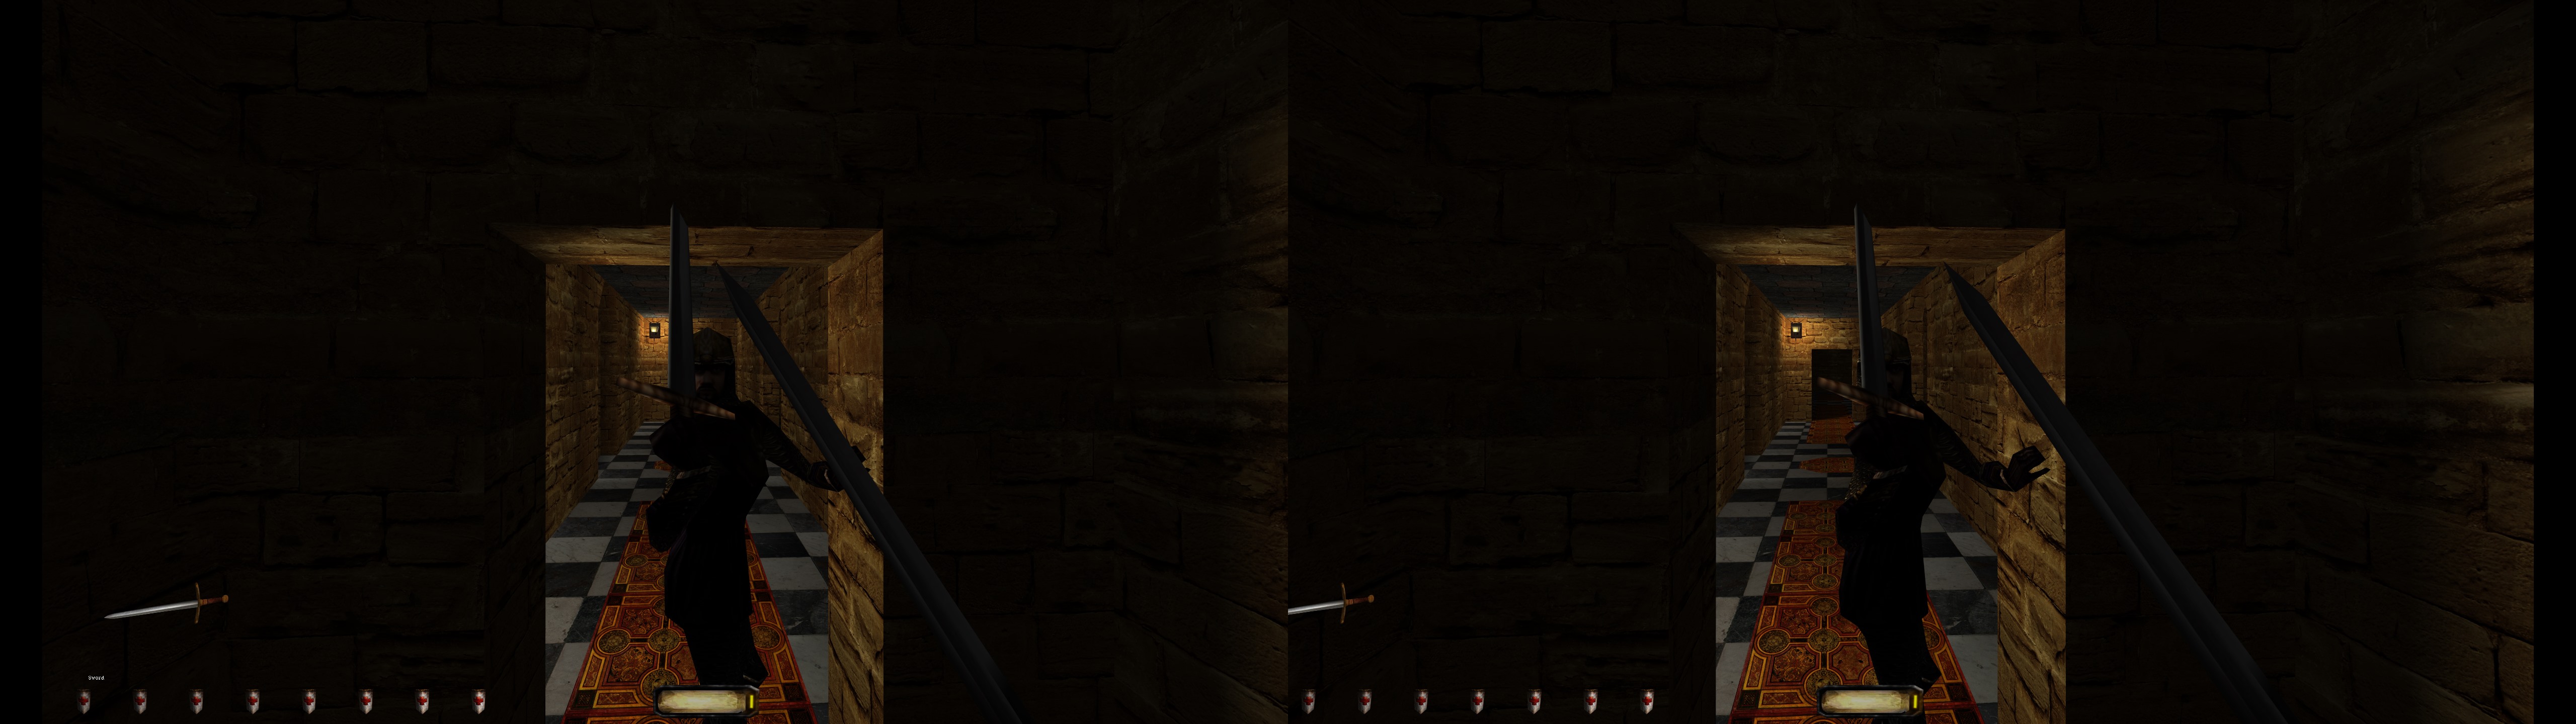
3D Vision and geo-11 fix for Thief Gold. Tested with the GOG version.


Fixed
- Fixed "layer" was making 3D broken at high convergence levels. Nothing needed to be done with current dgVodoo.
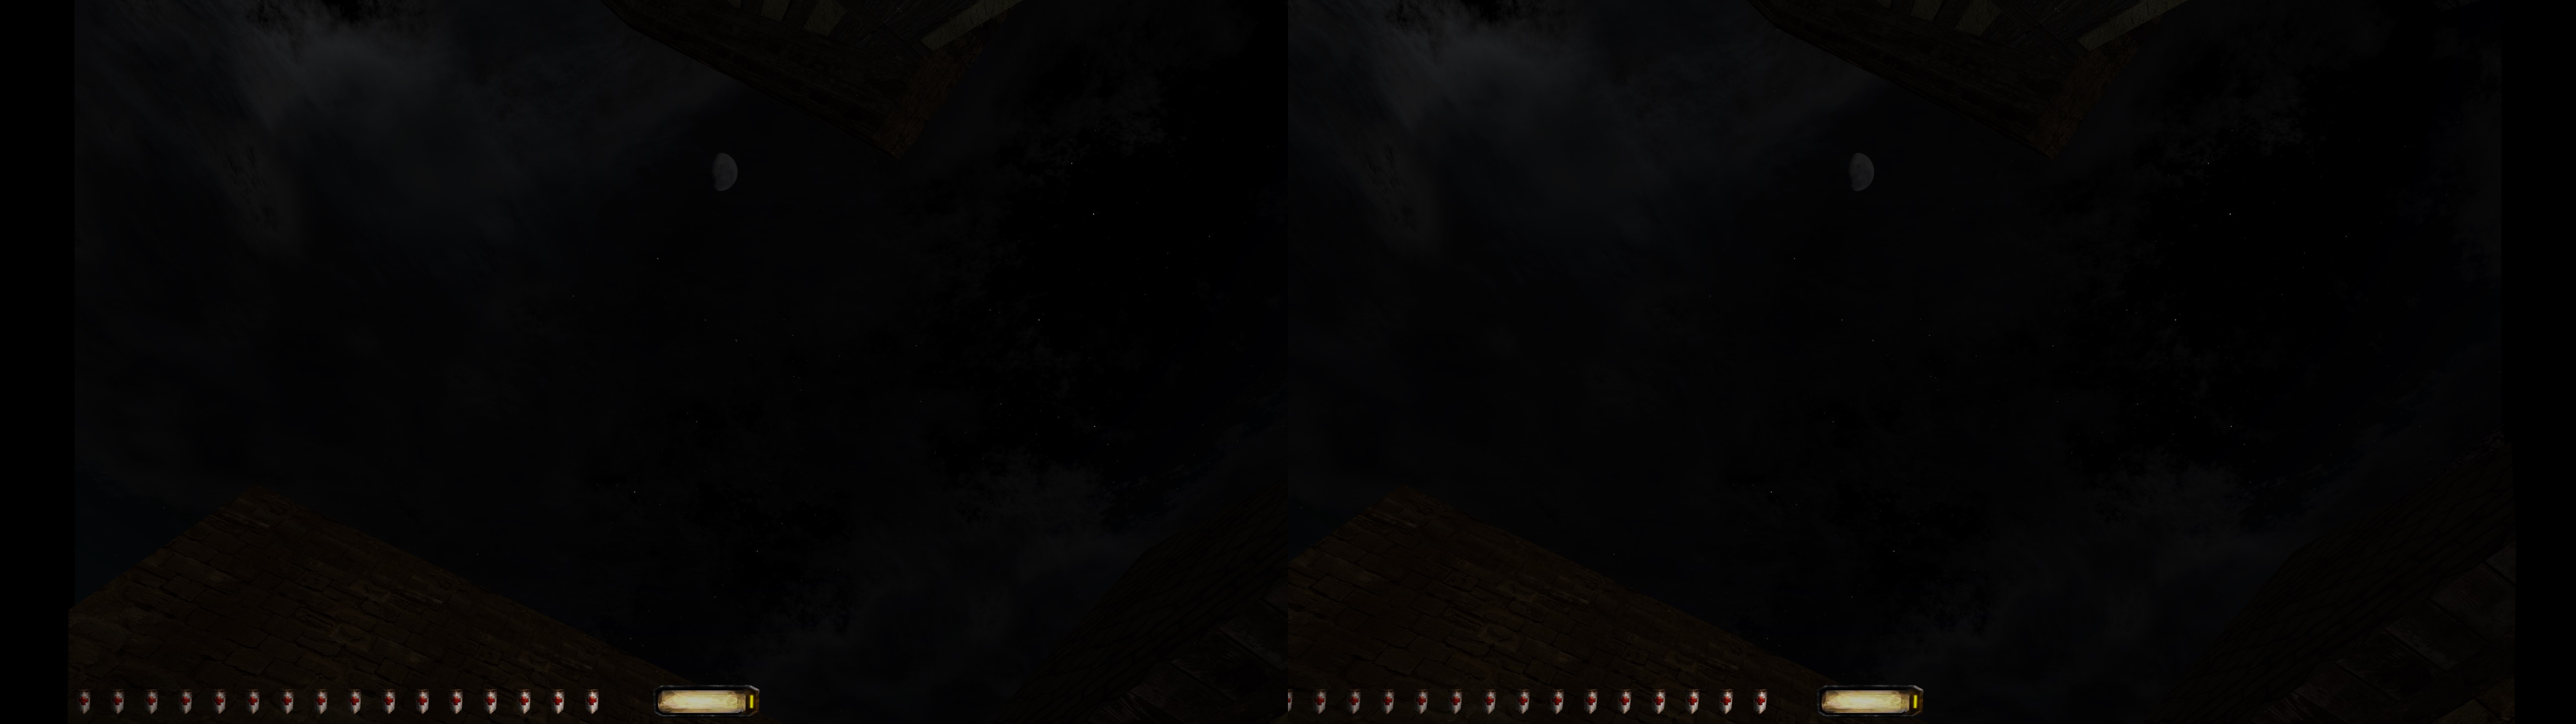
- Stars and moon at proper depth if you use the HD mod.
- Improved Nvidia laser crosshair, but it's still imperfect. Remember that you can disable it with ctrl+F12 (default hotkey). Can't be used with geo-11, but also not needed.


Installation
- Use the latest TFix.
- I recommend installing the HD texture mod afterwards. This fix puts the stars and moon at full depth while not breaking other elements.
- IMPORTANT: in "cam_ext.cfg", the "use_d3d_display" line must be uncommented for the game to use DX9 as the base. That's needed to avoid some bugs from the original DX6 mode.
- geo-11 (with build v0.6.58): download this file and extract its contents in the "Thief Gold" folder, where "THIEF.EXE" is. Remember to edit "d3dxdm.ini" to change your "direct_mode" to the output you need. It's sbs by default. For 3D Vision monitors, use "direct_mode = nvidia_dx11" in "d3dxdm.ini". "direct_mode = nvidia_dx9" doesn't work at this time. The fix has "swap_effect = 4" enabled in "d3dx.ini", to force flip model so that "nvidia_dx11" mode works.
- 3D Vision (older and for old dgVoodoo): download this file and extract its contents in the "Thief Gold" folder, where "THIEF.EXE" is.
- Download the latest dgVoodoo 2 release or WIP version (latest confirmed working is v2.79.3) here: http://dege.freeweb.hu/dgVoodoo2/dgVoodoo2/
- From inside its "MS/x86" folder, copy "D3D9.dll" into the game folder.
- Open "dgVoodooCpl.exe" and configure it like this, for example, tuning the resolution and some other settings to your liking:


- Boot the game and accept the profile changes (it will ask for admin rights for geo-11 Nvidia modes).


Hotkeys
F1: convergence presets (1, 1.5, 2). 1.5 by default.
Right mouse button: hold it for almost a second to trigger a temporal low convergence preset. Useful for when you want to use the bow.


If you liked the fix and want to contribute for more future fixes, you can donate to this PayPal account: masterotakusuko@gmail.com